Over the years since Autodesk released AutoCAD P&ID, I have found that when teaching clients how to customize the program to fit their needs, understanding the difference between Tag Formats and Annotations has always been a hurdle in the beginning. This article will explain how annotations work and how they can be customized to fit your needs.
The tag format prevents items from being duplicated in a project (this is a symbols unique identifier), while annotations allow us to display the tag and/or other properties in a drawing. A new block is always created based on the selected annotation when creating a new annotation (or label).

Annotations can be created as AutoCAD Block References, with additional behaviors that display properties of the item being annotated.
There are two methods when creating or adding annotations to a P&ID; simple and compound annotations.
Simple Annotations – drag & drop
Simple Annotations are added by dragging and dropping a cell from the Data Manager (DM) onto the drawing. These annotations are not based on a defined annotation style and use the current annotation style set in the drawing which takes on the properties (font style, size, justification, etc.) of that style.
A simple annotation carries the Format String “TargetObject.Property,” where “Property” is the property specified by the selected cell of the DM. This annotation knows exactly which dynamic component it is associated with and displays a line so the user knows where to place the annotation.

As you can see from the image above, by dragging the E-101A Description from the DM and dropping it into the drawing, the property knows which component it is associated with by providing a dashed line to that component for placement.
Compound Annotations – defined styles
Compound Annotations allow for more flexibility and customization than Simple Annotations.
Annotation Styles are defined at the class level in the P&ID Class Definition hierarchy. Once defined, that style can be used to annotate any target P&ID component defined at or below that node in the hierarchy due to the parent-child relationship.
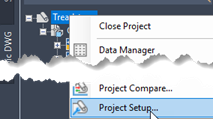
Annotation Styles are associated with an AutoCAD Block Definition, which accounts for their appearance and behavior. They are added and edited in the Project Settings. Pressing “Edit Annotation” raises the Symbol Settings dialog for the Annotation Style selected.


Symbol Properties define the Annotation name and the block reference used to define the annotation look and feel.
Symbol Name is the name of the Annotation Style. This is the name that appears in the submenu when the right-click/Annotate… context menu item is selected.
Block is the name of the block definition that this Annotation Style is based. The name is always the Symbol Name post-pended with “_block.” To select a different block definition, select the Block edit box, and press the more button.

Doing so will raise a three-step navigation dialog allowing you to choose a drawing, then a block within that drawing, and alter settings for the annotation to use for the Annotation Style. Once you have selected the block definition, the contents of that block definition will be copied into your ProjSymbolStyle.dwg (PSS.dwg) and renamed to SymbolName_block. Once you edit the block, you can rename the block definition to your liking.
AutoCAD P&ID ships with a file called AnnotationTemplates.dwg. This drawing file contains a number of block definitions that may be useful as templates for a variety of standard annotation styles, since the more complex settings are already in place.
General Style Properties are the standard AutoCAD entity properties, such as color, layer, and linetype that will be used when the annotation (an AutoCAD block reference) is created and inserted into the drawing.
Other Properties – is the area of the dialog offer settings that are specific to Annotations.
- Symbol Scale – is a scale factor at which the annotation will be inserted into the drawing.
- Use Target Properties – will cause the annotation to be inserted with the same entity properties as the target entity, rather than using the settings from “General StyleProperties.”
- Linked – controls whether the annotation moves along with the target entity.
- Auto Insert?– controls whether the annotation will be automatically inserted when the target entity is inserted into the drawing. Auto Insert?” has three possible states, worthy of further discussion.No Auto Insert – is self-explanatory. Annotations based on this style will never be automatically inserted into the drawing.
The other two settings apply for the default Annotation Style for a given P&ID class, and take effect when placing an asset of that class into the drawing from the tool palette.
- Auto Insert With Prompt – If an asset is placed in the drawing whose default Annotation Style specifies Auto Insert with Prompt, the user will be automatically prompted to select a position for the annotation.
- Auto Insert – If an asset is placed in the drawing whose default Annotation Style specified Auto Insert, then the annotation will automatically be placed in the drawing at the positions specified by “Offset X” and “Offset Y” from the asset’s insertion point.
The Offset X and Offset Y settings are only enabled when the Auto Insert state is Auto Insert.
Note that the Auto Insert option, relying on the Offset X and Offset Y settings, does not work when the target is a pipe or signal line. The reason is that the software cannot determine a single insertion point from which to calculate the offset from a line, as it can do from an asset.
Auto Insert using an offset will also have an effect when placing an annotation via the right click “Annotate” menu. Normally when using the Annotate… context menu, you would be prompted to select a position using the mouse. However, when annotating an asset using an annotation style which specifies “Auto Insert” with an X, Y offset, the annotation will be placed at that offset.
- Use Leader indicates whether a leader will be included with the annotation.
- Orientation changes how the annotation is rotated.
Creating a New Annotation Style
In this example, a new Annotation Style at the Equipment - Driers level will be created by pressing the “Add Annotation” button, and then pressing the more button beside the Block property, as described above. In the navigation dialog, select “AnnotationTemplates.dwg” and press “Open.”

Path to file - C:\Program Files\Autodesk\AutoCAD 2015\PLNT3D
In the Select Block dialog, select “InfoTag3Line” as the block definition upon which we’ll base the new Annotation Style.

Here, the annotation is given the name “Driers Info Tag” and the desired settings are made to the Style properties.

Press OK. This will copy the block definition into PSS.dwg and rename it to “Driers Info Tag_block”.
Every Annotation Style points to a unique block definition. Symbols may share block definitions, but Annotation Styles do not, because the Attribute Definitions for each Annotation Style need to be set up to be unique to that Annotation Style.
Assigning Format Strings to Attribute Definitions
Pressing the “Edit Block” button allows editing of the Block Definition upon which the Annotation Style is based. To set up for this section, select our new Annotation Style, “Driers Info Tag” from the pick list and press “Edit Block…”

This operation will drop you into the AutoCAD block editor for the Annotation Style’s block definition.

This template contains three Attribute Definitions, named UNASSIGNED1, UNASSIGNED2 and UNASSIGNED3. It also contains some geometry; an underline beneath UNASSIGNED1. Finally, it contains a linear parameter, associated with a pair of stretch actions.
These Attribute Definitions currently are not set up to display any particular properties of an Annotation’s target entity. Pressing the icon in the small toolbar will prompt you to select an Attribute Definition. Making that selection will then raise the Assign Annotation Format dialog. This dialog lets you set up the Attribute Definition to display properties of the target entity, properties of the Drawing, or properties of the Project.

When this dialog is first raised for an UNASSIGNED Attribute Definition, the word “UNASSIGNED1” appears as the first delimiter. In fact, for Annotation Formats, the area between subparts needn’t be thought of as a delimiter at all. Any kind of free text is allowable. Remember to remove or change this delimiter value if you don’t want any additional text appearing when the annotation is placed in the drawing.
Click the Class Properties button (furthest on the left), make sure use Target Object is selected, then choose from the left side, equipment, then Tag on the right side. See below:

After pressing OK, the value of the UNASSIGNED1 Attribute Definition has been changed to #(TargetObject.Tag). Notice that the linear parameter named UNASSIGNED1 has been edited in the block editor as well.


Next, click on the Assign Format Button again and choose UNASSIGNED2. This brings the Assign Annotation Format dialog box up again. If you want Manufacturer, select it, again with the Use Target Objects Properties checked. Remember to remove the UNASSIGNED2 from the delimiter value.

Click Assign Format Button again and choose UNASSIGNED3. This time, add 2 subparts and enter “@” as the delimiter between the subparts. Click the class properties button for the first row and drill down on the left side to Driers, and then choose Design Pressure from the right side. Repeat for the second row, and choose Design Temperature. Click OK.

I hope this helps readers understand how Annotations can be used and customized to fit your company’s needs.
Submitted by David Cruze, AEC Solutions Engineer, Hagerman & Company, Inc.

Comments