While most of the styles in Autodesk InfraWorks provide a great start, there are times when we will need to show either additional information or create a custom style.
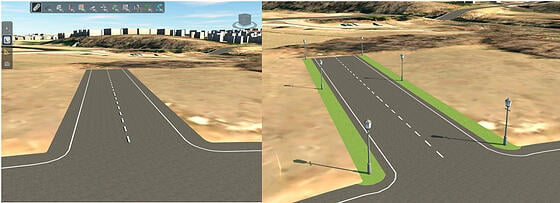
While InfraWorks can sometimes seem daunting, the process is relatively easy. This article will show how to go from the “before” on the left, to “after” on the right.

Begin by opening the Style Palette which is located in the Home tab > Stylize Model panel.
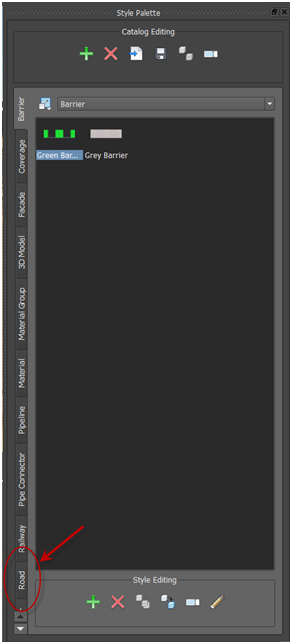
The Style Palette is similar to the AutoCAD tool palette, tabs and all. In order to stylize the roadway, we’ll need to select the Road tab.
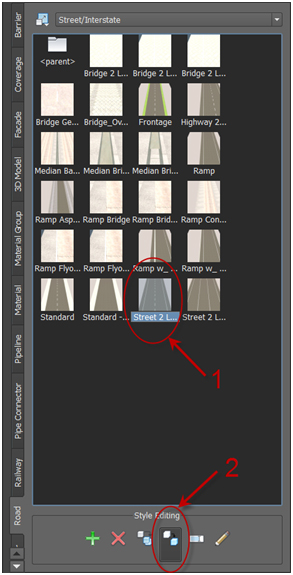
Here we see the default styles that were installed with InfraWorks. It’s best to find a style that most resembles what you are trying to accomplish. Always make a copy of that style first and edit the copy.
- Highlight the style we want to copy.
- Select the Copy at Local Level icon found in the Style Editing area.

A copy is made in the same location. Rename the style by highlighting the name. This will be called Street 2 Lane - Lights
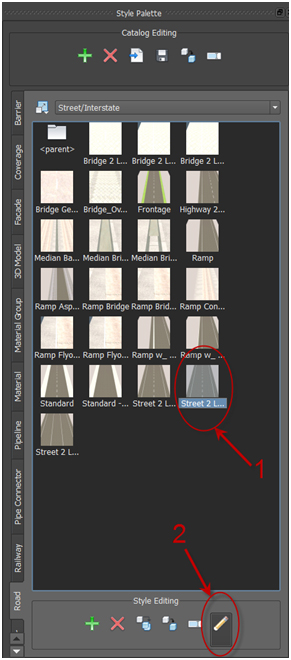
Once the new style has been renamed, the edits can be made.
- Highlight the newly named style.
- Select the Edit icon in the Style Editing area.
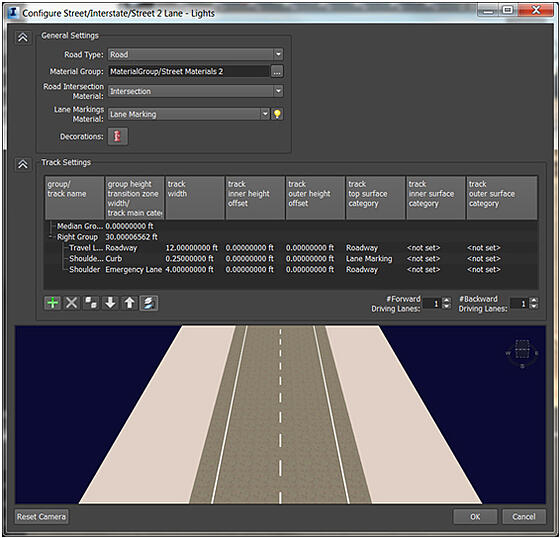
With the editing dialogue box open, we can begin making the changes to the style. Note the style preview at the bottom of the dialog box.

In the Track Settings area, we do not have a Median Group, only a Right Group. Here is where we’ll start making the edits and additions.

The shoulder width is set for 4 ft. The new style requires the shoulder be 2 ft. Click on the track width column where we see 4.0 ft. and make the text change to 2 ft.
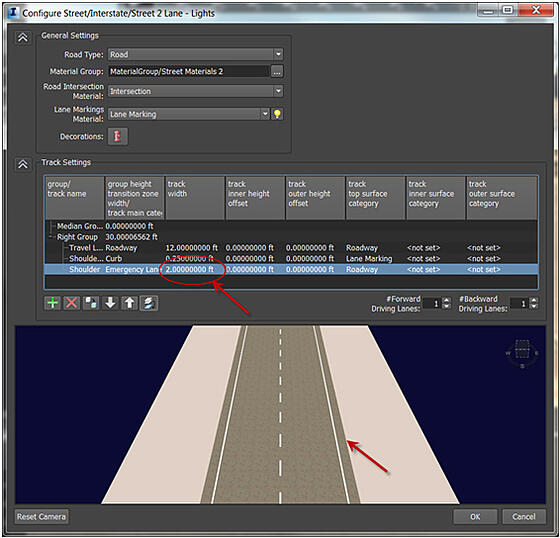
With the track width changed to 2 ft., the preview updates and there is now a 2 ft. shoulder.
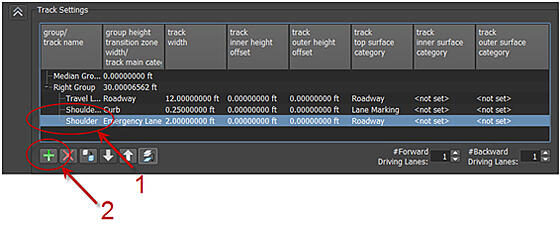
With the shoulder updated, the group/track name for the street lights can be added. InfraWorks adds new items before the item highlighted.
- Highlight the Shoulder
- Select the plus symbol to add
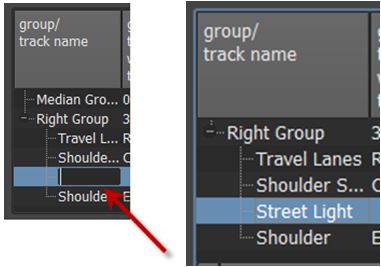
Click on the group/track name and rename to Street Light

Because the street lights will be outside the shoulder, we need to move it to the bottom of the list. Highlight Street Light and select the down arrow.

The street light location is now correct.

Next a track width for the street lights needs to be placed in. 5 ft. is required.
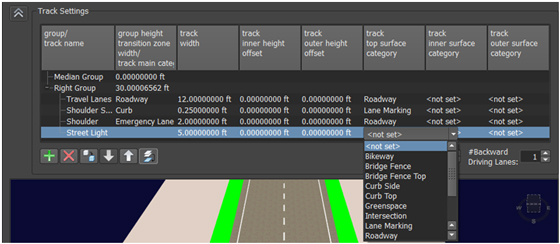
There is a 5 ft. area outside the shoulder, but the top surface (or material) needs to be set. There are several options here, but the surface needed is Greenspace.
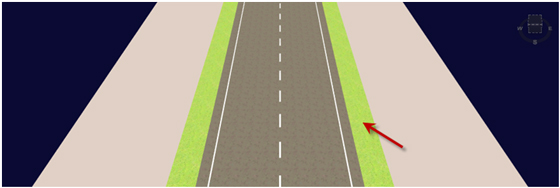
The updated preview.
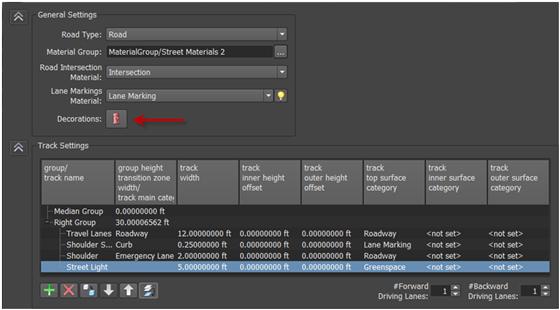
The road has been stylized, so the street lights can be added. Select Decorations in the General Settings area of the dialog box.
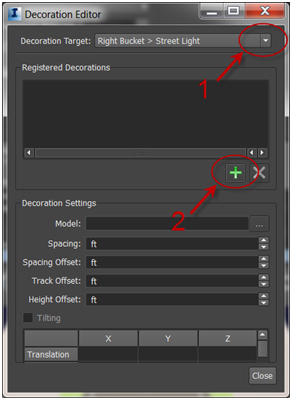
- Set the Decoration Target by selecting the correct group, i.e. Street Light
- Select the add icon
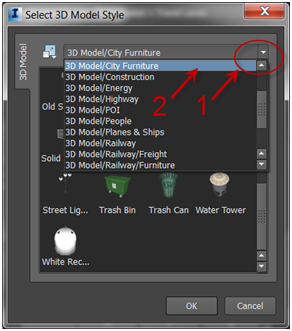
The Select 3D Model Style dialog box opens and we’ll need to search for the appropriate model
- Select the pulldown arrow
- Select the appropriate directory for the model
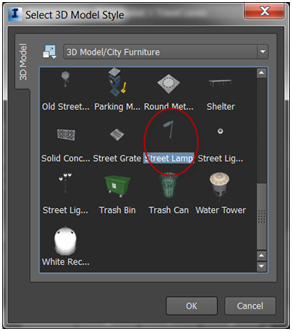
Depending on which directory is selected, we’ll see models that can be added to our style. In this case, street lamps need to be added, so we’ll select that model and click OK.
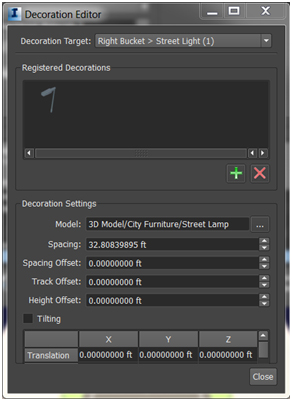
The street light has been added to the Registered Decorations and now we can specify the distances, etc. for placement.
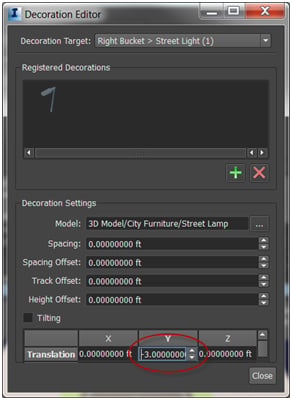
The lights should be located within the Greenspace, so under Translation – Y, we’ll move them into the shoulder by 3 ft. Note the (–) sign in front of the distance.
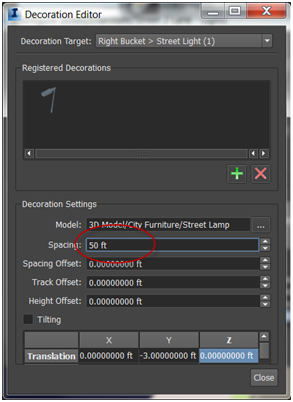
The spacing between the lights should now be set and we’ll set that distance to be 50 ft.
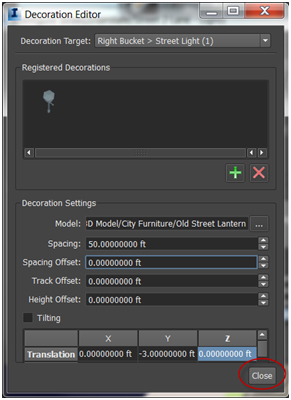
Once complete, click Close.
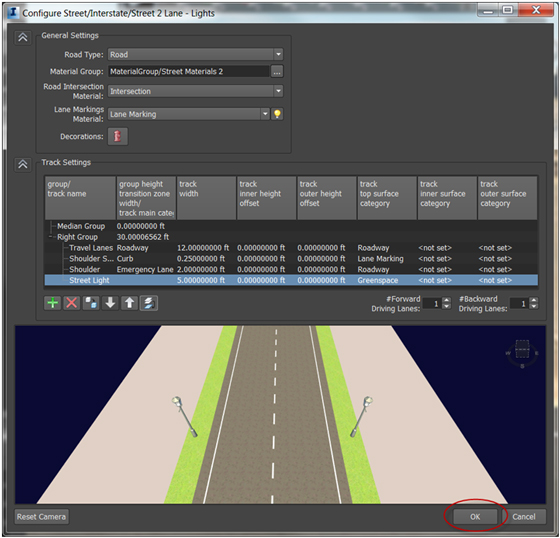
In the preview, we see the completed style with adjusted shoulder and street lights. Click OK.
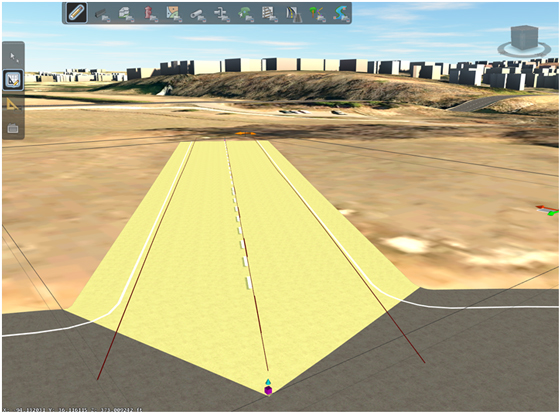
The new style is created and now we’ll need to apply that style to the section of existing/proposed roadway. Select the section of roadway by clicking on it.

Open the Properties palette found at the Home tab > Explore panel.
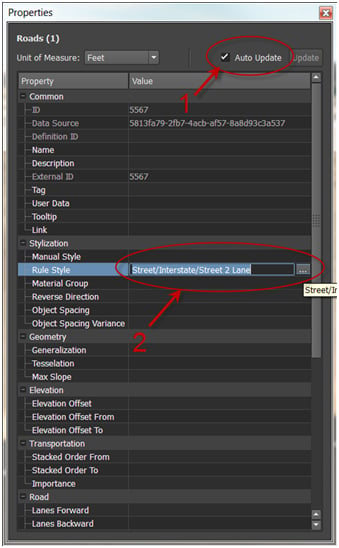
- Toggle Auto Update on
- Click on the 3 dot icon to change the Rule Style
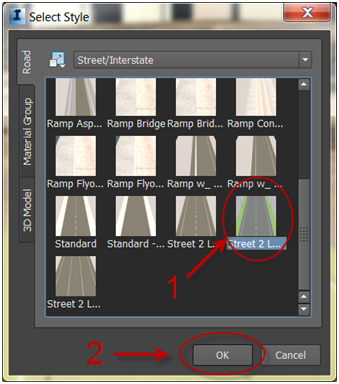
- Select Street 2 Lane – Lights
- Click OK
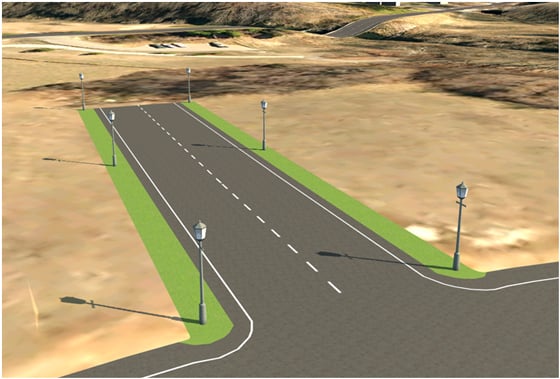
The selected area of road has been updated with the new custom style.
Using InfraWorks helps to differentiate services using visualizations that present various design alternatives.
The ability to create custom styles within InfraWorks, allows to more effectively communicate design alternatives to project stakeholders, i.e. clients, municipalities and the public. Doing so will speed approvals, gather important feedback and improve public engagement.



Comments