Autodesk® Revit® can finally array objects in X, Y & Z, just like AutoCAD! Seriously? No, unfortunately it can’t. However, with a simple Dynamo script, you can create a custom grid and streamline your Revit workflow. Dynamo is a very powerful, practical, and easy to use add-in for Revit.
If you don’t have Dynamo (version 0.8.0 or later), you may download it from http://dynamobim.com/. Also, If you have not upgraded to Revit 2016, Dynamo will still work with Revit 2015.
Over the past few years, AutoCAD has continued to improve the functionality of the Array command. Some of this functionality is very useful and I would love to see it implemented in Revit. One of my biggest criticisms is that it is hard to Array in multiple directions. For example, I could easily assemble a linear or radial array of a set of lights, trees, desks, etc., but what if I want to lay out a rectangular grid for a lighting plan, a classroom full of desks, or an orchard of trees? This would be easy in AutoCAD, but in Revit I would need to create a linear array, and then array that array. This results in a nested array, which is not easy to modify after creation.
Instead, in order to avoid nested arrays, I simply build a Dynamo script and make a nice array in Revit. The following instructions and screen shots will explain the process step by step.
- Launch Revit
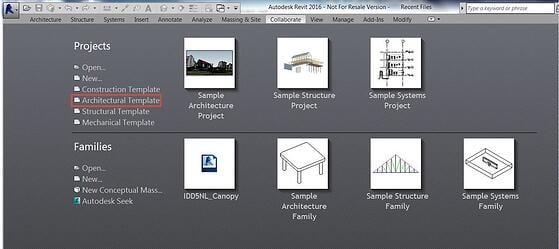
- Create a New project from the Default Architectural Template:
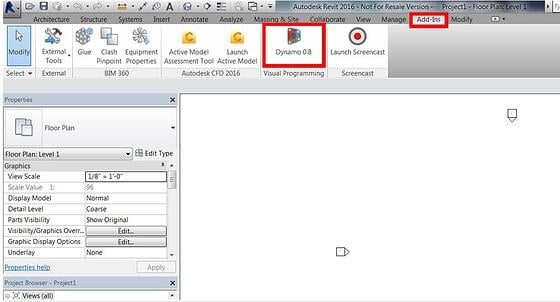
- Launch Dynamo by clicking on the Add-ins Tab, then the Dynamo button:
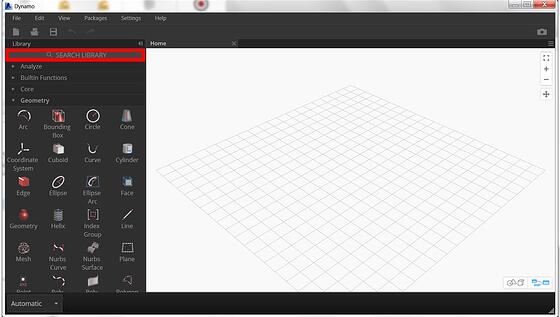
- Dynamo should launch with a window that looks like this:
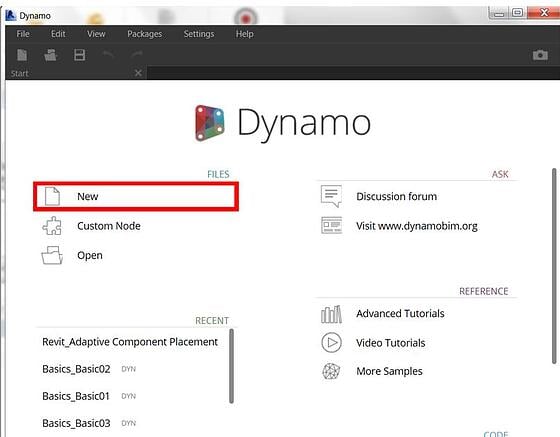
Note: If you have dual monitors it would be good to adjust the screens so you can see both the Revit and Dynamo windows at the same time. - Click the New button (shown on the previous image). At this point you have started a new script and your screen should look like this:]
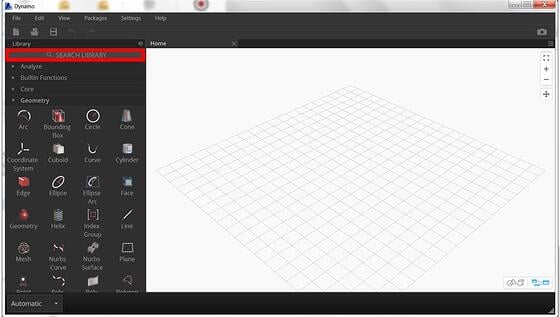
- Over the next few steps, you will find several different nodes in the search box and string them together. In the search box, simply type “Number.” You will then see all of the available nodes matching the search criteria on the left side. Under Core>Input Actions, select Number. You should then see the node appear in your work screen.
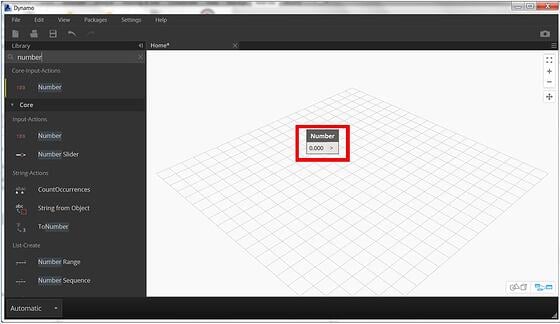
- Select the Number Node, Press Ctrl + C to copy it to your clipboard, Ctrl + V to paste another instance of that node into your workspace. You can click on the nodes and move them as needed. Arrange them like this:
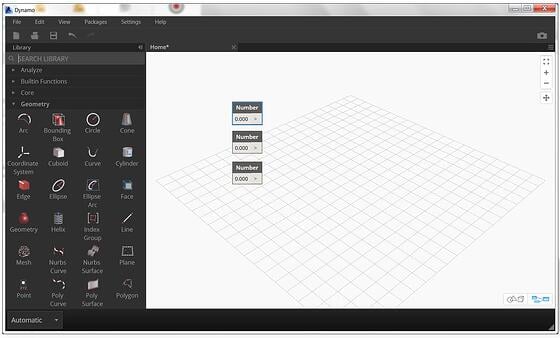
Tip: You can also Pan and Zoom and re-center your screen as needed. - Type ‘grid’ into the Search bar and find the XYZ grid node. It should be the first one listed as shown below:
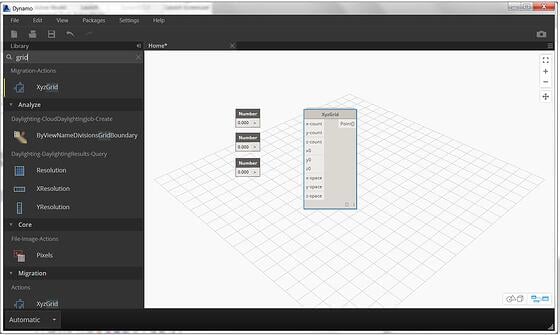
- At this time you can connect the Number Nodes to the XYZ Grid node by selecting the arrow on the Number node and dragging it to the intended input on the Xyz Grid Node. Connect your Nodes as shown below:
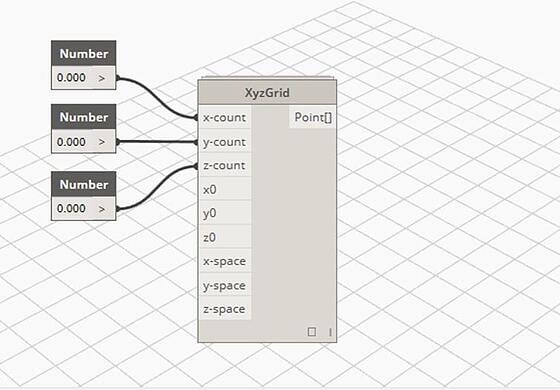
Tip: You can select multiple nodes at once by dragging a window around all or some of them and adjusting them as necessary. - For this exercise I want to create a grid of desks for an office. I know I need 7 rows in the X direction and 5 in the Y direction. I want to be sure to specify 1 in the Z direction.
- I also want to copy and paste 2 more number nodes so I can specify the numbers for the rest of the inputs on the xyz grid. Arrange them similar to the next image and be sure to set your values on the new number nodes. Notice you can connect a number node to multiple inputs on the xyzgrid node.NOTE: With this version of Dynamo, there are no units. Dynamo will correspond to your Revit units. The image below shows 1 for the x, y, & z spacing. Therefore, it would space my grid at 1’-0” in Revit. That is probably too small and will cause overlap when I add desks to this script.Make sure you set it to 10 or your desired spacing. You want to allow for the desk and some circulation space.
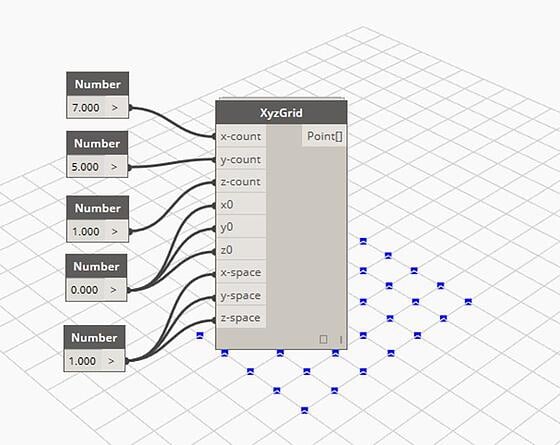
REMINDER: The above image should show 10 for the x-y-z space instead of 1.
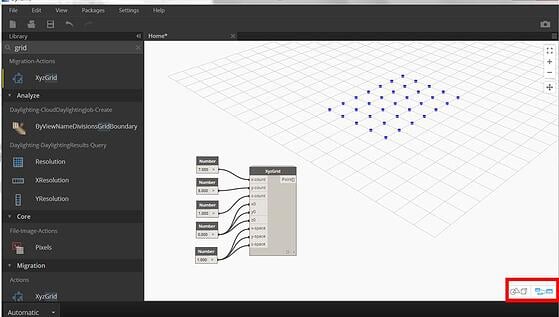
At this time you should see a bunch of blue dots on the grid behind your script. If you want to pan and zoom, you can press and drag the scroll wheel. You can also toggle between the script and model view as shown below:
- Type ‘Family’ into the search box. The First entry should be the Family Types Node. Place this into your script.
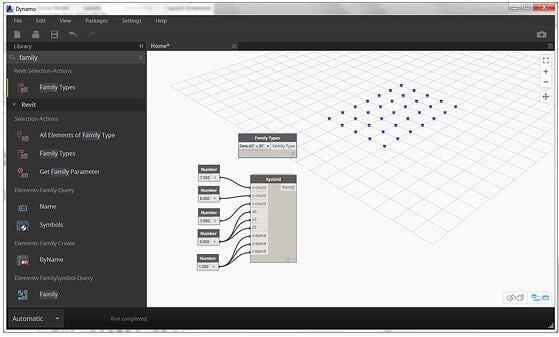
- Notice the drop down menu. This displays all family and family types loaded in the original Revit Model. Change the selection to the Desk 60” x 30.”
- With “Family” still entered into the search bar, scroll all the way down to By Point Node, located under the title “Elements-FamilyInstance-Create”. Place and connect the nodes as shown below:
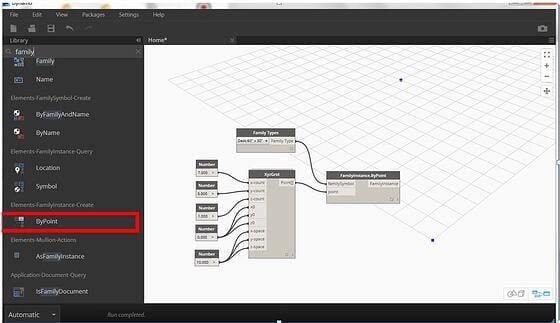
- Once everything has been connected, switch over to Revit and see that the script has worked and placed a grid of desks in your model as shown in the default 3D view below:
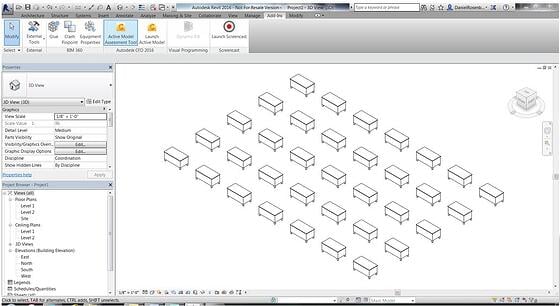
- At this point, you can go back to dynamo and make adjustments as needed. (Be careful with the Z command. I accidentally had 10 set on mine and it took t
- You can save your node at this time.
- Notice that if you move or delete a desk in your Revit Model, dynamo will fix it or add it back in at the correct location.
I hope you find this tutorial useful and are inspired to use Dynamo with Revit to improve functionality.
Notice the drop down menu. This displays all family and family types loaded in the original Revit Model.



Comments