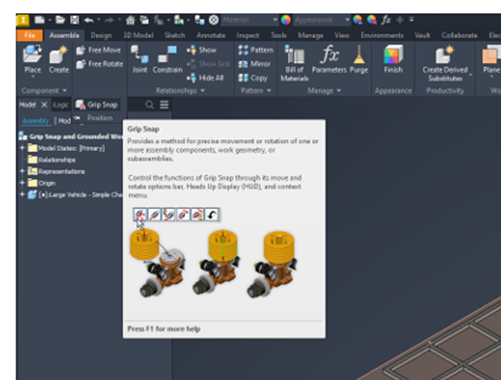
Recently, I've increasingly relied on the "Grip Snap" feature in Autodesk Inventor® instead of the conventional Assembly Mate Plane/Plane constraints. This shift is particularly beneficial when dealing with large assemblies containing fully constrained models that require no movement. Grip Snap proves to be a more convenient option, especially during multiple assembly revisions. Accessible from the Assemble Tab/Position Panel, it can be effectively paired with Grounded Work Points for enhanced functionality.
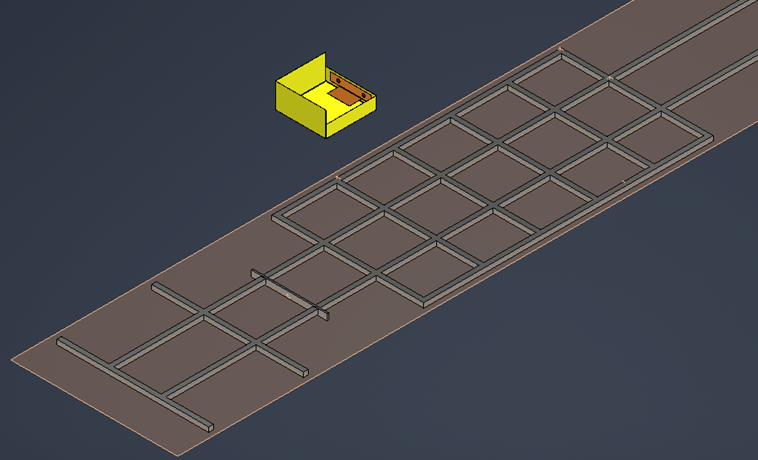
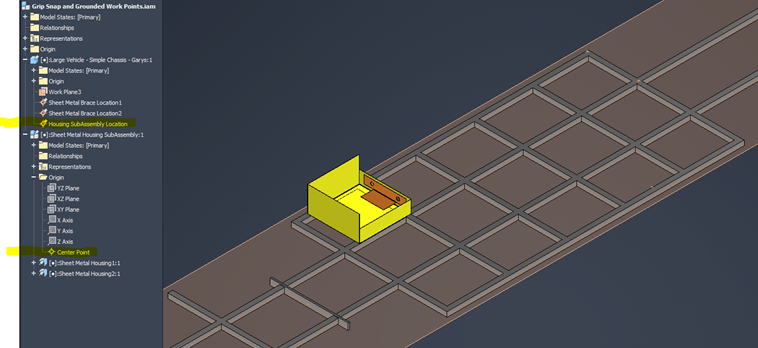
Here is one example of placing a SubAssembly at an exact location. I will temporarily place my yellow SubAssembly at a random location.
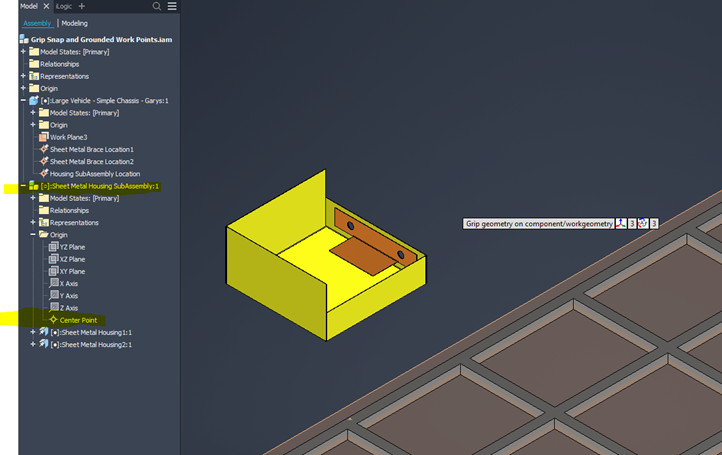
- To locate my yellow SubAssembly, I will choose “Grip Snap.” I will assemble the SubAssembly using only "Browser" mouse picks and will not need to select any geometry.
-
In Grip Snap, I will select the “Origin/Center Point” of my yellow SubAssembly shown in the above picture.
-
Then, choose the “Free Drag” icon in the Grip Snap Toolbar.
-
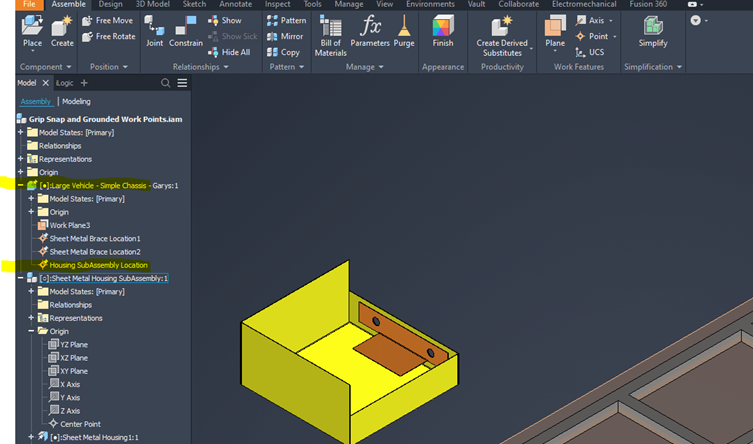
Then select my existing “Housing SubAssembly Location” grounded work point that I created earlier on my first model:
-
Then, simply right-click "Continue" and "Commit and Ground.”
My SubAssembly is now "Grounded" at that location with no degrees of freedom. So, an alternative to many assembly Mate Plane/Plane constraints is to use "Grip Snap" and "Grounded Work Points" for assembling. I hope this gives you an alternative for your large assemblies.
Enhance your Autodesk Inventor skills with more expert tips. Contact us for personalized support!


Comments