There are a variety of variables available for stairs. In this article we will look at a specific group of variables within the stair family.
The Support group of variables will allow us to change the type of support, stringer type to a C Channel profile and adjust the position of the stringers. This can be applied and used for both Straight and U shaped stairs.
Getting Started:
Start a new project with the Architectural template provided with the install of your software.
Start the “Stair by component” and duplicate the 7” Max 11” Tread stair. Name the duplicate stair Steel Stair.
Alternatively: Expand Families in the Project browser, Expand Assembled Stairs> Select 7” Max 11” Tread , Right Click and choose Duplicate> Rename stair to Steel Stair.
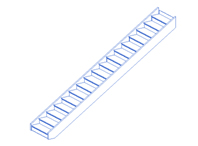
| Place the Steel Stair with no Railing.Finish Stair I recommend initially placing the stair with no rail until you get |
 |
|
|
|
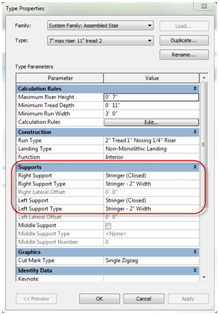
| Look at stair Type Properties
Note Supports: Right Support |Stringer Closed and Right Support Type | Stringer-2” Width Same is applied to the Left supports Expand Right Support and look at options (close) |
 |
|
|
|
| Since there is only one “Right Support Type” defined in the Template, select the button to the far to open the default “Right Support Type”, Stringer-2” Width. |
|
|
|
|
| In Type Properties you should now have the Family:
System Family: Stringer and Type: Stringer-2” Width. |
 |
|
|
|
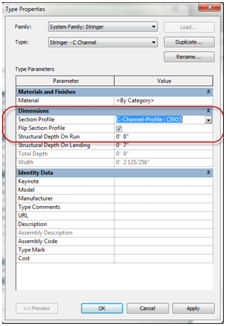
| In the Type Properties dialog box, Duplicate the Stringer type and name it “C Channel”. Expand the “Default” Section Profile under Dimensions. There is a Default C-Channel –Profile: C9x15 Note for this exercise we will us the Preloaded default. If you want See steps at the end of document. Expand the “Section Profile” again, this time select the C Channel Select Apply Select Ok Twice Note the direction and placement of the Channel. If it needs to be Select “Flip Section Profile” and adjust “Structural Depth On Run” as |
 |
|
|
|
| In the Type Properties apply the “C Channel” Stringer to the Left side of the stair. There is also an option for a Middle stringer. |
 |
|
|
|
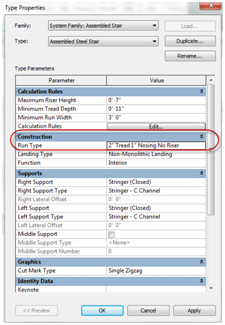
Option: Removing the Riser for the Steel StairSelect the Stair > Select “Edit Type” to open Type Properties> Select “Run Type” under Construction. |
 |
|
|
|
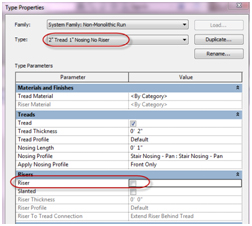
| In Type Properties for the Run Type> Duplicate the default “2” Tread 1” Nosing 1/4 “ Riser” and name it “2” Tread 1” Nosing No Riser”. |
 |
|
|
|
| Deselect the “Riser” check box, select OK. Verify that the 2” Tread 1” Nosing No Riser. Is applied to the Steel Stair Type. Select OK, Twice |
 |
|
|
|
| Final Stair based on adjustment made during the Exercise | 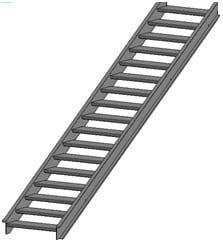 |
|
|
|
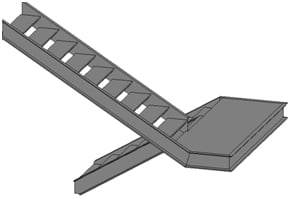
| U Shaped Stair based on adjustments made during the Exercise
Individual Members surrounding the landing cannot have their The Landing type is control by the setting of the Left and Right |
 |



Comments