Calculated Properties have been a part of AutoCAD® Plant 3D for many years; however, until Plant 3D 2023, most users probably did not know the functionality even existed. Before the 2023 version, you could only get to this software function by using a little-known command named “PlantDefineCalcProperties." As of 2024, if you execute this command, you receive a message that states, “Calculated Properties are now available in Project Setup, and the PlantDefineCalcProperties command will be deprecated.” So, you can still get to the old version currently, but the old version also does not have the recent updates for calculated properties available in Project Setup. As a result, it is highly recommended that you no longer use the old version and just let the old command ride off into the sunset. In addition, since it is now more visible and therefore more accessible to users when creating custom properties in Project Setup, it is time that we provide a little bit of a tutorial on the topic and not have to repeat this same info over and over again in future articles, blogs, and webcasts.
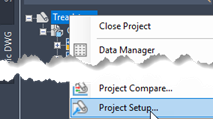
First, let's open the Project Setup by right-clicking on the project name in the Project Manager. Once the Project Setup dialog box is open, navigate to the Pipe Run Component using the tree in the left-hand pane.
Plant 3D DWG Settings > Plant 3D Class Definitions > Piping and Equipment > Pipe Run Component
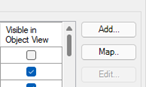
With the Pipe Run Component selected, select Add on the right side of the dialog box, which will open the Add Property dialog box. We will start with the same custom property we use in another article, "AutoCAD Plant 3D/P&ID: Pipe Line Numbers," but provide a whole lot more detail.
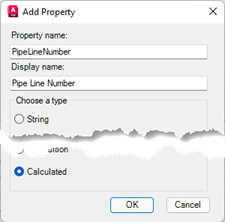
In the Add Property dialog box, set the following:
Property Name: PipeLineNumber
Display Name: Pipe Line Number
Choose a type: Calculated
Then select OK.
No spaces are allowed in the Property Name. Spaces are allowed in the Display Name.
Now, we are in the Add Calculated Property dialog box.
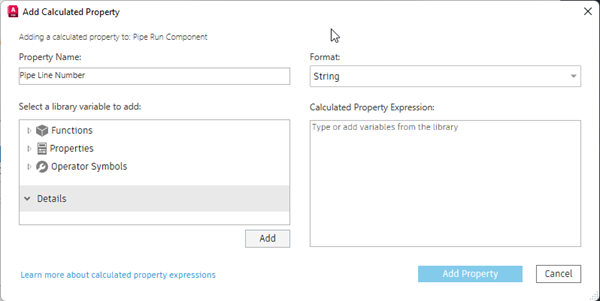
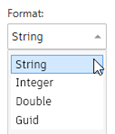
Now, we will break off into some details before we continue with a few examples. First, you will notice that the Property Name, which was set in the previous dialog box, cannot be modified here. The second thing we need to set before proceeding is the Format. The Format can be a String, Integer, Double (also known as a Real or a Float), or Guid (globally unique identifier). For the PipeLineNumber, we are creating a String, and we will do it exactly like the article mentioned above, making it similar to the out-of-the-box P&ID Line Number, which is a different sequence than the out-of-the-box Plant 3D Full Line Number. However, there is much more to do in the “AutoCAD Plant 3D/P&ID: Pipe Line Numbers” article that is not covered here, so this does not replace that article; it just explains that one section in more detail.
The Calculated Property Expression section is where we create and define the Calculated Property itself. Once you Add the Property, you can modify the Calculated Property Expression, but you cannot modify the Format for that Property.
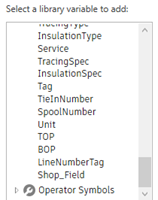
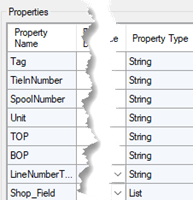
In the dialog box under Select a library variable to add, expand Properties, which contains a list of all the Properties available for the Category selected when we selected the Add Properties earlier. In this case, it's all the Pipe Run Component Properties. The images here show the bottom of the list of Properties in this dialog box and the Project Setup to see the relationship between the two. It is important to know if the Property is defined as a String, Integer, Double, or Guid so that it can be used with the correct Functions. Fortunately, you do not have to memorize the Property Types beforehand.
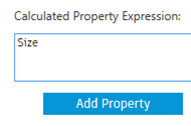
For the PipeLineNumber we are creating, locate and select the Size property. If you activate the Details, you will see that the Property Type is a String. Select the Add button to add the property to the Calculated Property Expression.
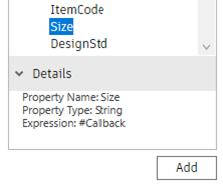
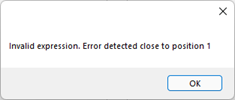
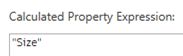
Size is a unique string property, which is one of the reasons I chose to do the Pipeline Number. If you were to select the Add Property button right now, even though Size is a String, you would get an error message that states, "Invalid expression. Error detected close to position 1." This is because the expression is both a String and a #Callback, so the Size property must be enclosed in quotes ("Size").
I am not sure if any other properties behave this way because this is the only one that I have encountered so far, but if you ever see that particular error message for a string property, then try adding the quotes.
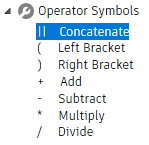
Now, it is time to talk about the Operator Symbols. These are self-explanatory, but I will highlight a couple of them now. Most are mathematical operators: +, -, *, and /. They are not related to the Format selected previously, but they can only be used with properties of Double or Integer unless the string is converted to a number. So I could use these operators with FlangeThickness because it is a double, but not with InsulationThickness without first converting the string to a number, but that will come later. The double pipeline (||) is for concatenating two strings together, so it cannot be used with numbers. I am not sure what the official name for the pipeline character is. I'm an old UNIX programmer, so I call it a pipeline. The Left and Right Paren/Bracket can be used in a mathematical equation or Function, which is where we are headed next.
As of 2024, there are eight available Functions, three more than we had in the old command and the 2023 version. The new ones are Round, Split, and Trim. That is important because it means Autodesk is providing us with more options, and hopefully, They will continue adding more functions in the future. If they do continue to add functions, then I will update this article. For now, I will list each function with syntax, examples, and results. First, I will list a little glossary.
str = string or property Enclose actual text strings in single quotes: 'Plant 3D.'
(I will use strings and not properties in my examples below)
obj = non-string object val = number chr = characters
lg = length or precision del = delimeter
pos = start position (a string starts at position 0, a split starts at position 1)
| FUNCTION | SYNTAX | EXAMPLE | RESULT |
| Substring | Substring(str,pos,lg) | Substring('Plant3Ddwg',5,2) | '3D' |
| ToUpper | ToUpper(str) | ToUpper('Plant3Ddwg') | 'PLANT3DDWG' |
| ToLower | ToLower(str) | ToLower('Plant3Ddwg') | 'plant3ddwg' |
| ToString | ToString(obj) | ToString(5*5) | '25' |
| ToNumber | ToNumber(str) | ToNumber('25.7’) | 25.7 |
| Round | Round(value,lg) | Round(25.71737,2) | 25.72 |
| Split | Split(str,del,pos) | Split('10-29-2024', '-',2) | '29' |
| Trim | Trim(str,chr) | Trim('11abc123ref1','1') | 'abc123ref' |
You can add variables (Functions, Properties & Operator Symbols) by selecting the variable and then selecting the Add button, or you can double-click the variable (which is what I usually do), or you can simply type the variable in the Calculated Property Expression section. Fair Warning: Everything can be typed directly into the Calculated Property Expression section, but if you do this, make sure you correct mistakes such as spelling and/or operators, or the calculated property will either give you an error or just come up empty. It is not case-sensitive, though. However, I would follow the case of the variable because previous versions were case-sensitive, and I have seen versions in the past that were not case-sensitive, and then the next version was. In my opinion, it is better to be safe than sorry over such a minor thing.
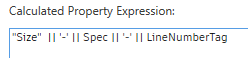
Now, let's finish the PipeLineNumber and create other examples based on the above information. Using whatever method you choose, the PipeLineNumber Calculated Property Expression should look like this: "Size" || '-' || Spec || '-' || LineNumberTag
To complete the process, select Add Property at the bottom right.
In the properties palette, looking at a piece of pipe, it will look like this:
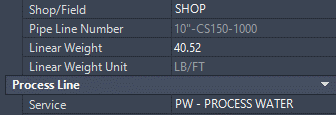
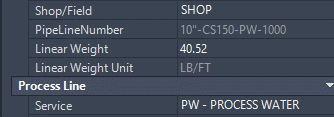
Out-of-the-Box Project Pipe Line Number Article Project
Here are three more examples for you to try out some of the other functions and properties:
Plant 3D DWG Settings > Plant 3D Class Definitions > P3d Line Group
Add > Insulation / Calculated > String = ToUpper(InsulationThickness || '"/' || InsulationSpec)

Plant 3D DWG Settings > Plant 3D Class Definitions > Piping and Equipment > Pipe Run Component
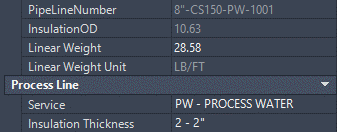
Add > InsulationOD / Calculated > Double = Round(MatchingPipeOd + ToNumber(InsulationThickness),2)
Plant 3D DWG Settings > Plant 3D Class Definitions > Piping and Equipment > Pipe Run Component > Flange
Add > Label / Calculated > String = Substring(Split(ContentIsoSymbolDefinition,'=',3),2) || Facing


Weld Neck RF Flange Slip On RF Flange
Beyond calculated properties, AutoCAD Plant 3D project setup plays a crucial role in optimizing workflows. Setting up a project correctly ensures that all custom properties, calculations, and settings align with project requirements. Understanding how to configure project settings efficiently can save time and improve consistency across drawings and reports.
Calculated Properties is an extremely powerful tool in Plant 3D for processing the data of multiple fields into a single value that can be used in BOMs, Reports, Annotations, and any other type of output that you might find valuable for your or your client's project.


Comments