With the newly released version of our favorite Building Design software, Autodesk Revit 2019, I thought it would be a great time to share my top 5 favorite new additions to the software. There are many new features in Revit 2019, but so far my favorites are Tabbed Views, Levels in 3D, Uncropped Perspective Views, ability to Dimension Curved Objects in Section, and Double Filled Regions. All of these features are useful for any Revit user, and if you were looking for an excuse to upgrade sooner rather than later Tabbed Views alone might be the only reason you need to start using it today.
I know this feature has been requested for quite some time, but the newly introduced Tabbed Views was worth the wait. Not only do the views now display as tabs at the top of the view pane, but they can be switched to Tile Mode which will allow you to easily slide any view over to your dual monitors. When views have been tiled, you can also easily rearrange them within Revit and have better control over which views you need and can snap to place them exactly where you want them. The screenshot below shows what the View window looks like with the views Tabbed:
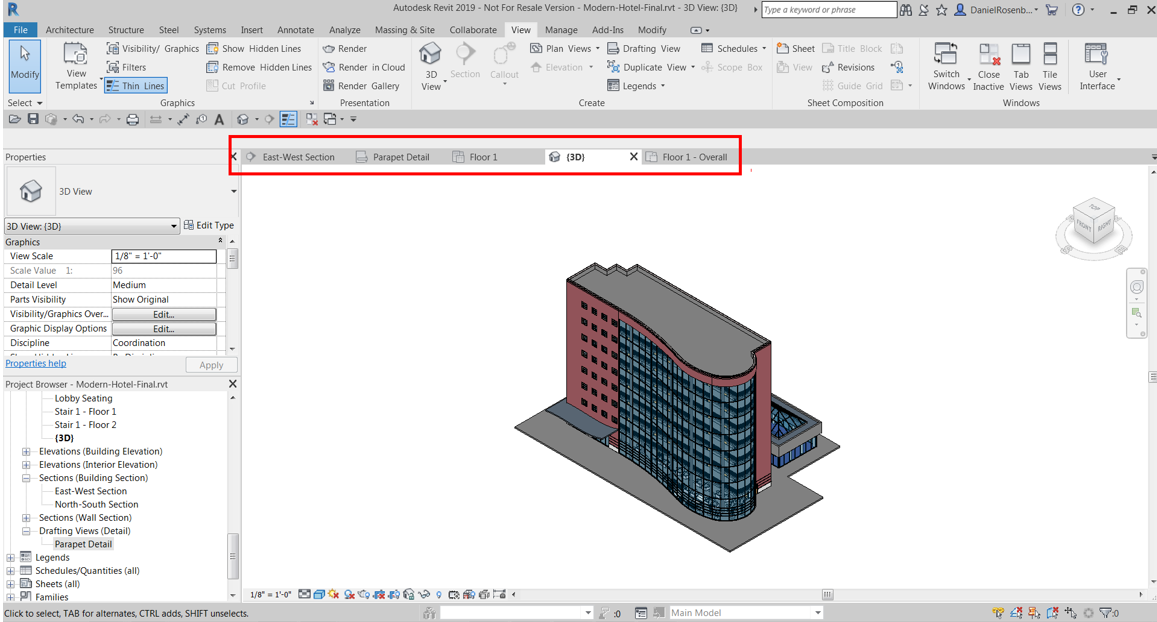
Each tab has the view name listed and it is subtle, but it also has an icon for the type of view it is. If you want to tile your Views, simply type WT for Window Tile or go to View>Windows>Tile Views and you will get the views tiled on the screen. You can then click on the Title of the Tab and drag it to a new location or snap it to the edge of another tile:
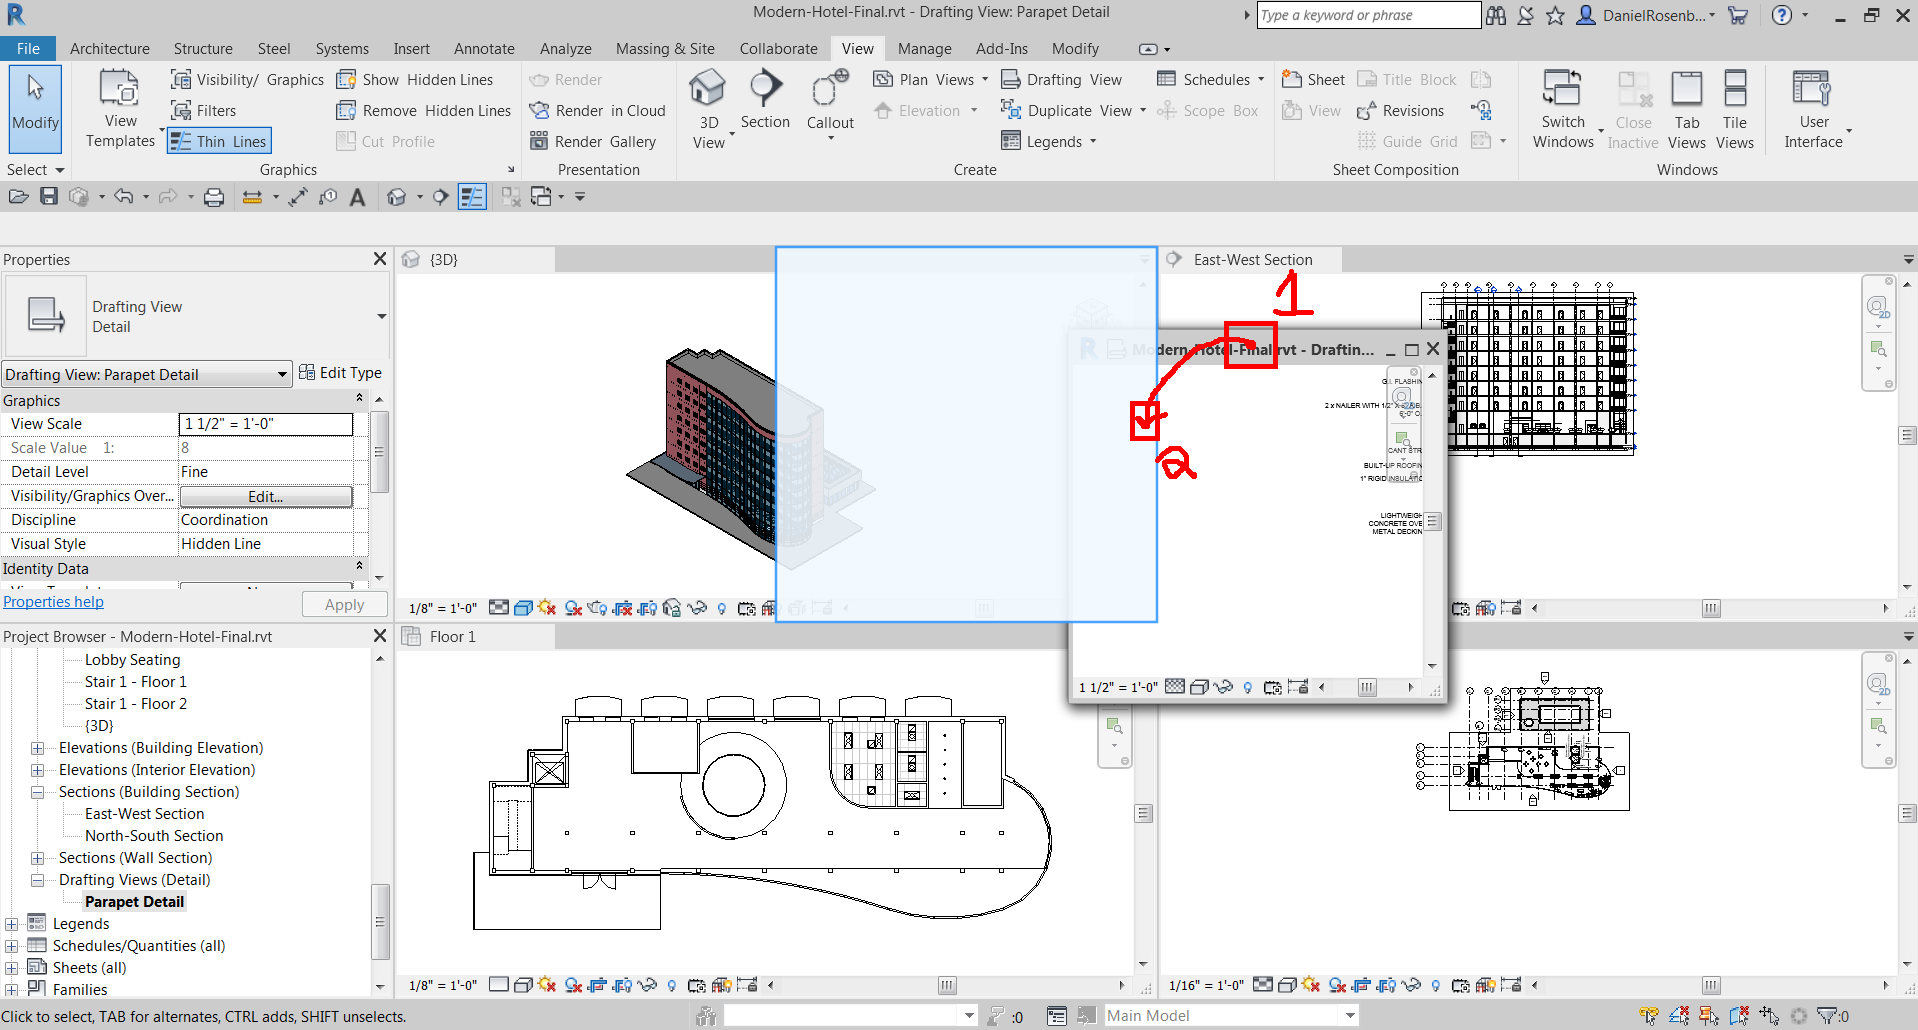
In the above image, you can see my first click was directly on the Tab of the view name indicated by the number 1. I was then able to hover over the edge of another view and snap my view to the new location. You can also drag a window and dock it to your dual monitor:

Main screen on Left, Dual Monitor on Right
If you want to return the view back to Tabbed Views, click TW for Tabbed Windows. One thing you might notice is that Window Cascade is no longer a thing. I was a big fan of using WC to cascade my windows to easily see what views were open, but I guess Tabbed Views made it obsolete so I won’t miss it too much.
Once you’ve had some fun playing around with Tabbed Windows, you should navigate to a 3D View. You will notice that your default 3D view now shows your Levels in 3D! You have all of the same functionality you would in an elevation or section view. For example, you can turn the bubbles on and off, change the elevation, and double click on level head to navigate to the associated Floor Plan view. Here is a shot of what it looks like in 3D
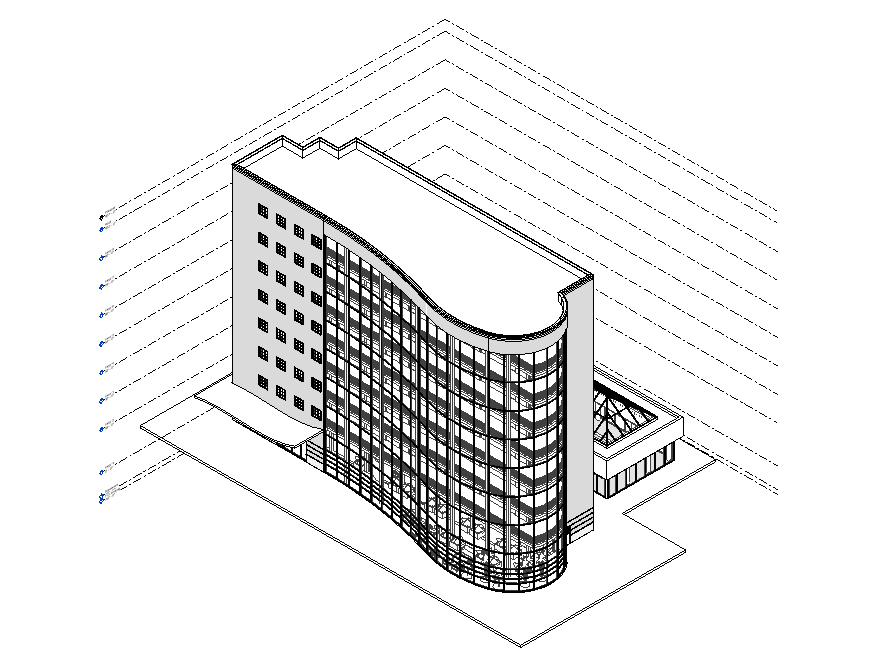
This feature makes it a lot easier to understand your levels in relation to your entire model and can be great for visualization. This is especially helpful for projects with levels that only extend to a portion of the model. If you don’t need to see the levels, you can select one of the levels and Type VH to hide the entire category in that view. You can turn them back on by going to Visibility and Graphics (VV or VG) and go to the Annotation Categories Tab and check the box for Labels.
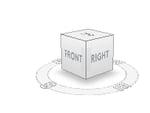
Another improvement that has been made in the 3 dimensional realm is the addition of uncropped perspective views. To enable this, simply navigate to a 3D view, right click on the View Cube and select Perspective. View Cube shown below for reference:
You can then use your scroll wheel on your mouse to zoom in and out. This actually moves the camera, which is nice. You can also press and hold the mouse wheel to Pan and hold the shift key to orbit. However, I prefer to use the walk and look tools found on the Navigation Wheel. This view is not meant to be placed on a sheet, it is best used for navigating your model.
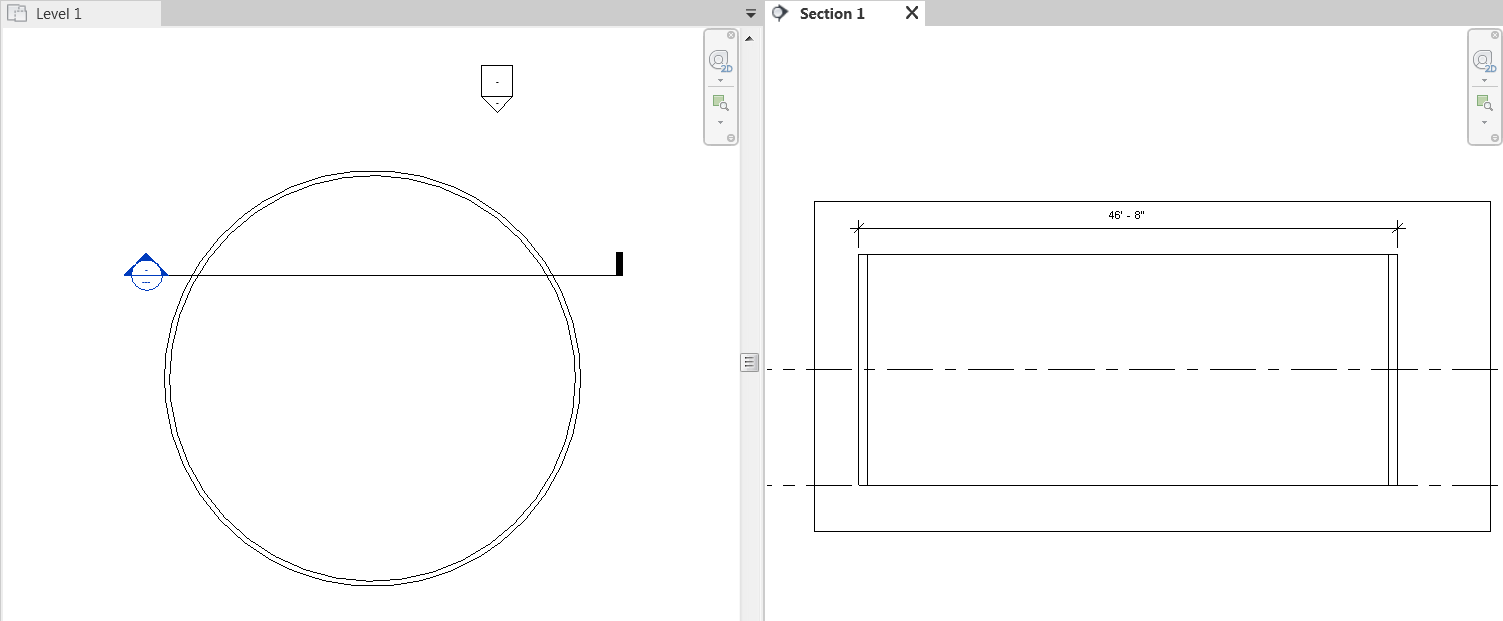
The next feature that I think is a great addition is the ability to dimension curved objects in section. Historically if you have a piece of curved geometry show in section there was no great way to dimension to the outer edge that is being cut in that plane. I used to use the old Detail line or Reference plane trick and snap the dimension to that, but that was never exactly accurate. Now, all you have to do is start the Aligned Dimension command and tap the tab key to click on the face that needs a witness line and click. Here is a screenshot below:
Last but not least is the ability to use 2 different fill patterns in 1 filled region family type. Here is an example of what the newly renovated Filled Region Dialog box looks like:

You should notice that in the above screenshot, you can now define a foreground and background pattern and color. The screenshot below shows what it looks like in use:
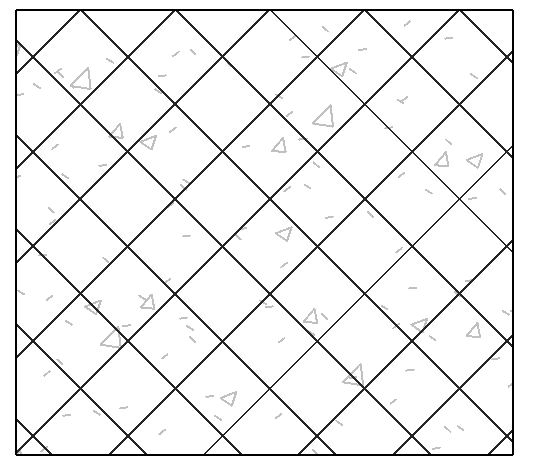
This new feature will take away the extra step of overlaying 2 separate Filled regions and will help make your details convey the information in a much more straightforward way.
These are just some of the new features, but there are many more. If you liked what you saw in this article, we will be doing a webcast where we will take a more thorough look at these features and many more. The improvements in this article were mainly useful for all disciplines but there were also some industry specific improvements like a whole new Ribbon Tab for Steel design and detailing, improvements to hydronic systems, and tons of new content added to the library. If you would like to see all of this and more be sure to keep an eye out for our What’s New in Revit 2019 Webcast.


Comments