With more frequency we see the industry modeling low voltage building controls. Many times the components used need to be noted with simple instructions like direction of mounting, or mounting configurations. The instructions for the different mounting configurations do not need to be long and complex instructions or parameter driven family creation.
Sometimes the difference in configuration can be noted on the plan view by simply creating a keynote tag with an image to note the configuration. Two different Keynote tags will need to be created since Revit does not have the ability to turn an image on and off by using a visibility Parameter.
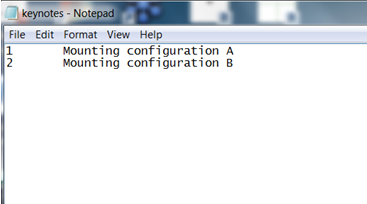
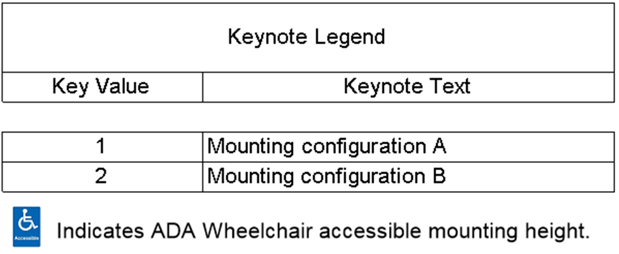
You begin by creating a simple Keynote .txt file. First, use notepad to create a blank file. The Keynote Value can be a Number or Letter, which should be typed first followed by the <TAB> key. This separates the keynote value from the keynote text that will show up in the keynote schedule.
In the example below, I am using only two keynote values to note two different configurations.
The notes can be used to describe your preference, but an image can be used as a yes/no type note. In this example I am using a wheelchair accessible ADA image to note that the card reader needs to be at a certain height. This is all an installer needs sometimes for the difference in install.
I chose an image from the web.

Open the image in Paint to crop and size the image.
Open the “out of the box” Keynote tag and save the family as a card reader keynote tag.
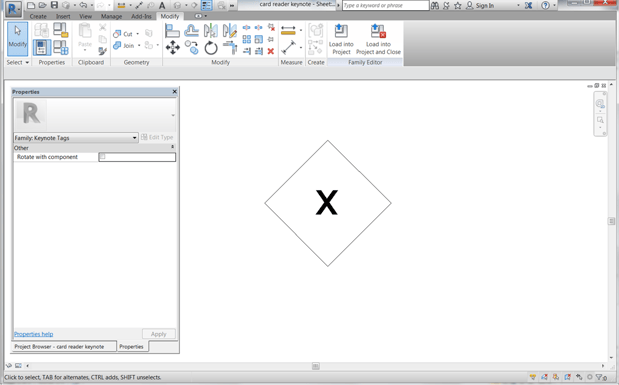
Make sure that the label inside of the tag is pointing to the key value Parameter.
Then “save as” again, naming the Keynote tag card reader “keynote ADA” this time.
Once the card reader keynote tag is open insert the Wheelchair accessible image.
The only hurdle that may come in to play is the size that the image will display once the keynote tag is placed. For some reason the first time I placed the image into the tag I sized the image to be what I would expect it to be when the tag is loaded into the project. When the keynote tag was loaded and used for the card reader, the keynote dialogue box came up correctly but the image was much larger than it should be. This required me to go back into the keynote tag family and resize the image.
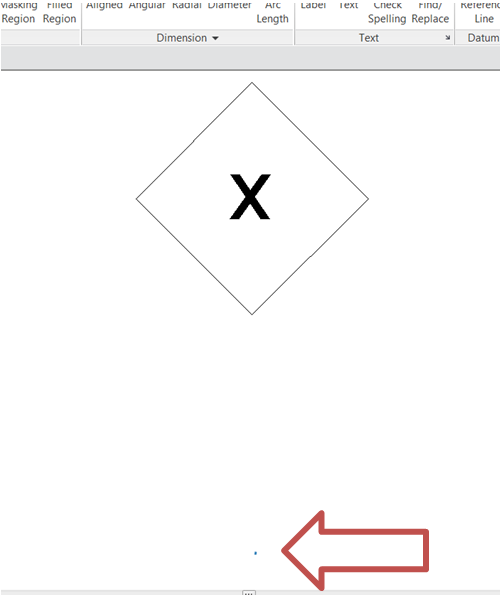
To get the image placed and sized correctly, I had to resize the image REALLY small and positioned well below the label and symbolic lines.
As you can see the image is barely seen and had to be adjusted several times.
One other hurdle you may encounter is that resizing the image using the proportional lock grips will only let you size the image down to a certain point. I had to then further resize the image by selecting it and using the scale command twice to get the image small enough to show up correctly in the project.
In the end after a few times going back and forth to adjust I finally got the ADA keynote tag to display the image to the size I preferred.
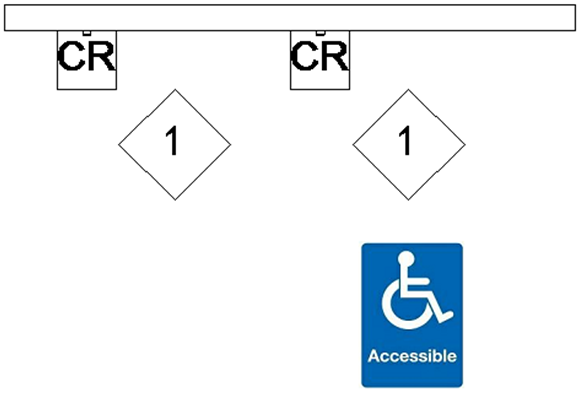
Here are two card readers with the same keynote value but one is ADA:
When the keynote legend is created you can always insert a row of text below with the same image and the intent of the image.
I hope this demonstrates a workaround for the use of an image in a keynote type setting.


Comments