In this article, we will walk through some of the potential steps to correct the problem of accidently editing files out of turn within a vault project.
This can occur when a user does not check out a set of files, makes changes, and then saves them over the local working copies. The Vault will work against a user’s efforts to edit files out of turn by marking the local files as read-only while they are not checked out, and by throwing dialogs to warn the users that the files are not checked out during the editing process.
In the example, the platform was modified by editing the base skeletal model (checked out) while not having the children models checked out. This, in turn, caused all of them to get updated out of turn. The user was notified to check out these files during the updating process, however “No to all” was chosen. In the following image we can see some of the erroneous statuses.
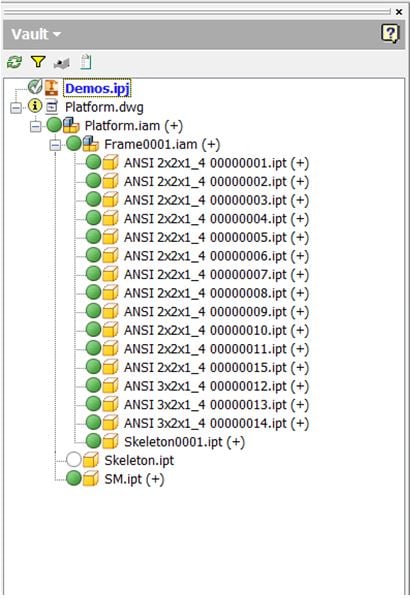
In this instance the drawing file and the children of the skeleton.ipt were all edited out of turn due to the update to said skeletal model. (This one component drives the remaining components, either through the Frame Generator or through Adaptive design)
At this point in the process, the user needs to decide what to do to his or her designs to reestablish balance with the Vault. There are essentially 3 different paths to take, 2 of which are very straight forward; the third however, can be very tedious depending on the level of need. Those three paths are:
- Keep the Vault files as the standard. In this instance, the local files are replaced, and a Get Revision or Refresh File operation replaces the files.
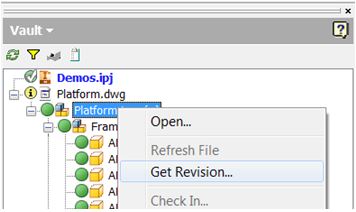
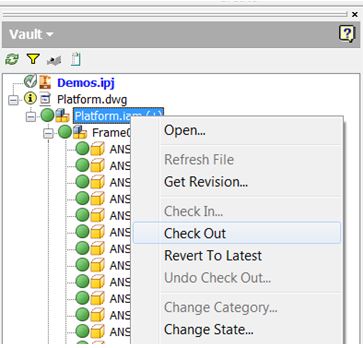
- The local files are the new Standard. In this instance, the files would simply be checked out of the Vault, which would give the user ownership back of the files.
- The Third option gets complicated… What happens when the changes that were made need to be recorded, but are separate from the initial design? Think of this as, “I should have done a copy design, but changed something instead”. If this was done in the Vault, it would have been relatively painless. The user could simply copy the design and then update the new models. Outside of Vault, however, this can be messy. An easy method is to use the Design Assistant. This tool is within the Inventor’s program list and allows users without Vault to effectively copy designs. In this instance, the Design Assistant is going to be used it to make new models in which the Vault will not see (they have not been vaulted yet).
To access the Design assistant, save and close any files inside of Inventor and then go to Start>All Programs>Autodesk>Autodesk Inventor 20xx>Design Assistant 20xx. (where 20xx is the version in question).
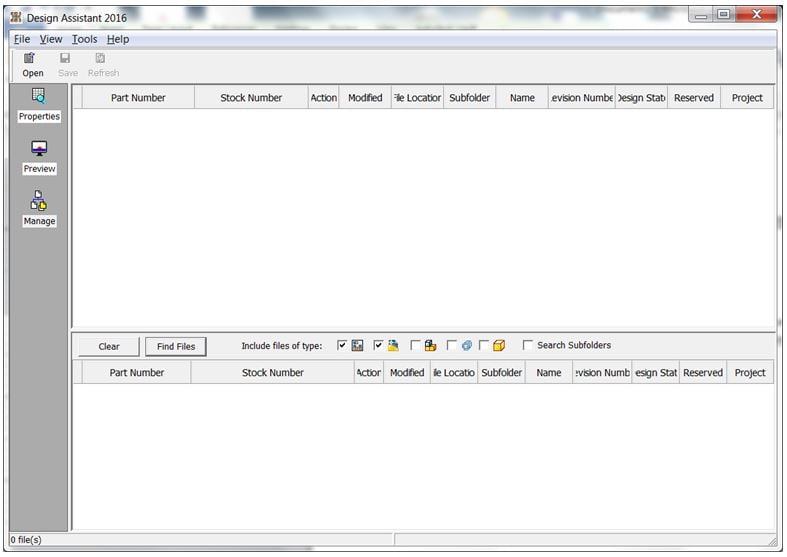
The design assistant dialog has 3 different interfaces; the one used here is the Manage Space.
Once the Design Assistant is open, choose Open and Browse to the document containing files that need copied. All related files will appear in the upper portion of the interface.

Next, the files that need copied need their “Action” changed from None to Copy, this will mark the file as Requires Edit. In this example, the SM file needs to be made into a new component. Once the file is marked for Copy and Requires Edit is shown, either change the name of the file, or change the path to where the file resides. In this example the name is being changed to SM2.

Here, right clicking on the name of the file allows the user to Change Name
![]()
Here, right clicking on the name of the path allows the user to Change Path
Once the name and/or path have been updated, all the parent files will show as updated. Repeat this process for each component within the design that new files are needed for. When done, click Save at the top of the Design Assistant.
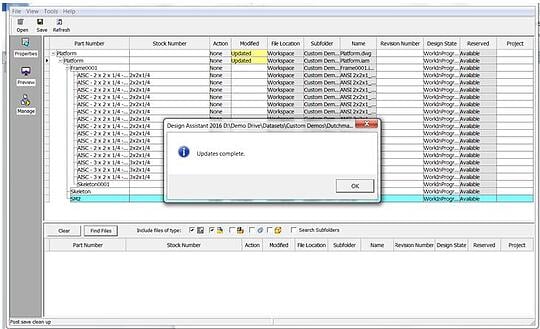
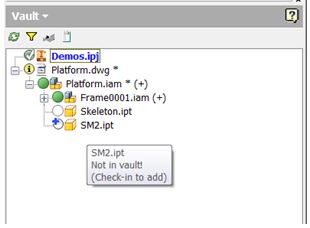
When done, go back to Inventor and open the Design. The newly created components should be marked with the “File Not in Vault” symbol. Right click on those files and check them into the Vault.
The remaining files in this instance are to be updated so that the Vault has the local files, so a check out was used to gain ownership of the documents. The files were then saved and checked back into the Vault.
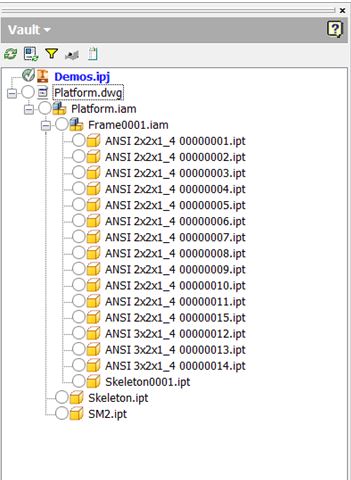
Restored all files back to a matching status
Remember that the steps above only apply to files that are edited out of turn AND that need to be defined as new designs within the vault (the edits out of turn should have been new designs and not edits to the original files).


Comments