I am sure by now most of you have heard of Dynamo and hopefully some of you have started using it. This post is for people that have heard of it, are familiar with what it is, but just haven’t taken the initiative to take it for a spin yet. If that is you, now is your chance to see what you can do with this amazing tool. This lesson will be very basic, but will show you how it works. My hope is that you will see how easy it can be to use and provide just enough of a jump start to get you wanting to learn and use it more.
This lesson will use Dynamo to take an Excel Spreadsheet and create a bunch of sheets inside Revit. This might seem a little mundane and maybe not even useful or practical for you personally, but it should provoke thoughts of the endless possibilities you can accomplish with Dynamo.
- Install Revit 2020. Dynamo will install with it. You can probably also use an earlier version, but some clicks might be different.
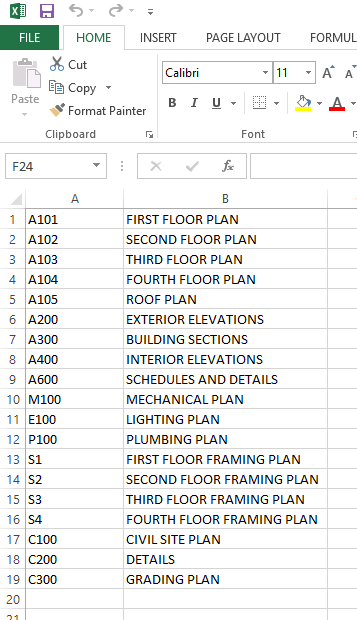
- Download my Excel file or create your own. Mine is very simple and is formatted as shown below:
- Launch Revit 2020 and start a file from the default Architectural Template
- On the Manage Tab, click Dynamo. That will Launch Dynamo in a new window:

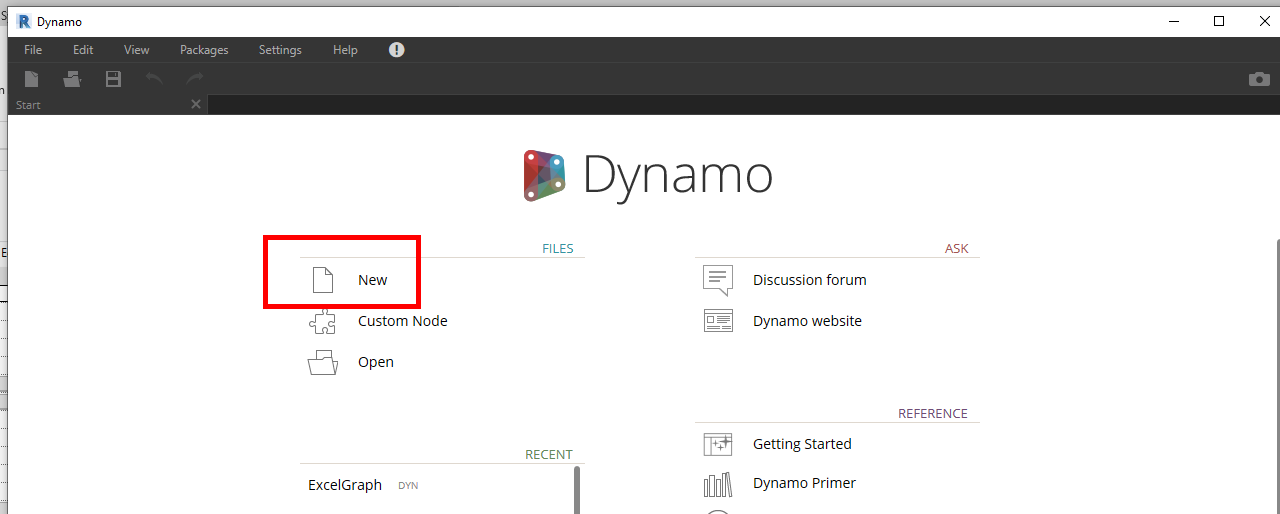
- Under the FILES section, click ‘New’:
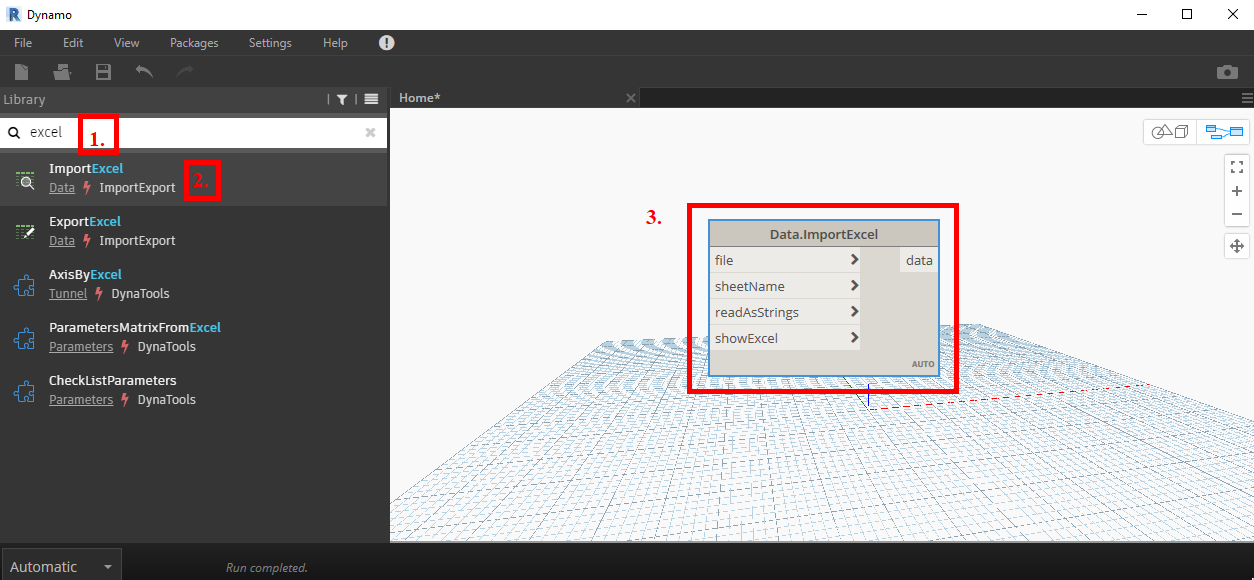
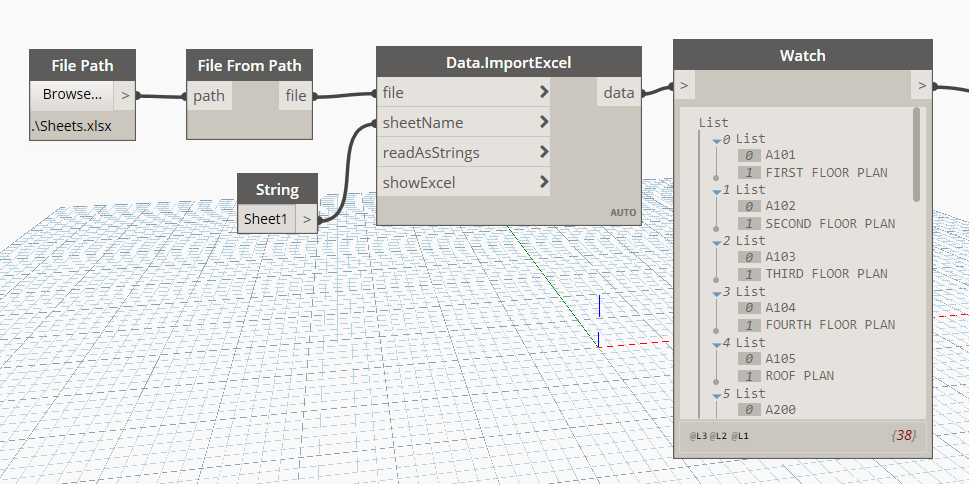
- In the Library Search box type ‘excel.’ Click on the Import Excel Node, and notice the node is added to your graph workspace as shown below:
- For the next step, use the same search box to find the ‘File Path’, ‘File From Path’, and ‘String’ Nodes. Arrange them as shown below. Then click on the Browse button and find wherever you saved the Excel file. Then type ‘Sheet1’ in the String Node. (Sheet1 is referencing the tab on my excel file where the information is located) You also need to click on the arrows to connect the nodes to the inputs as shown:
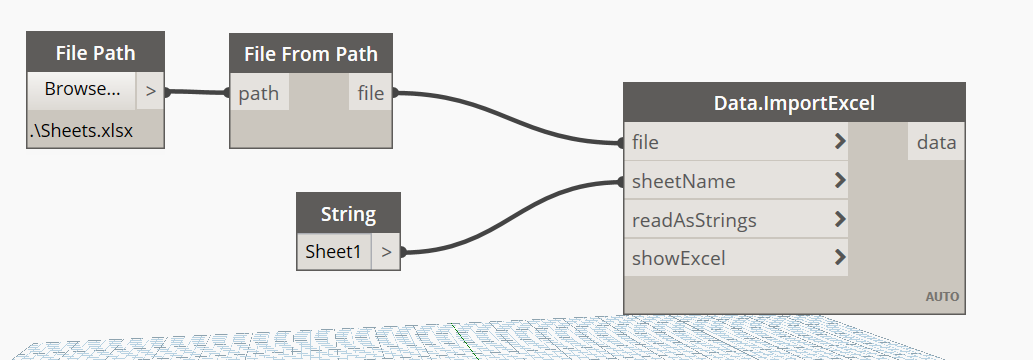
- We can leave the readAsStrings and showExcel nodes empty as it will accept the default as True. If you want to set any of these to False, you can use the Boolean node.
- Add a Watch Node to verify your data is being pulled in from Excel. If not, revisit the last several steps.
- Type ‘Transpose’ in the search box to find the List.Transpose Node. ‘GetItem….’ to find the Get Item at index node. Type ‘Code’ to find the Code Block Node. Alternatively, you can double click inside the graph and it will add a Code Block node. Type the information as shown in the Code Block then Arrange and connect the nodes as shown:
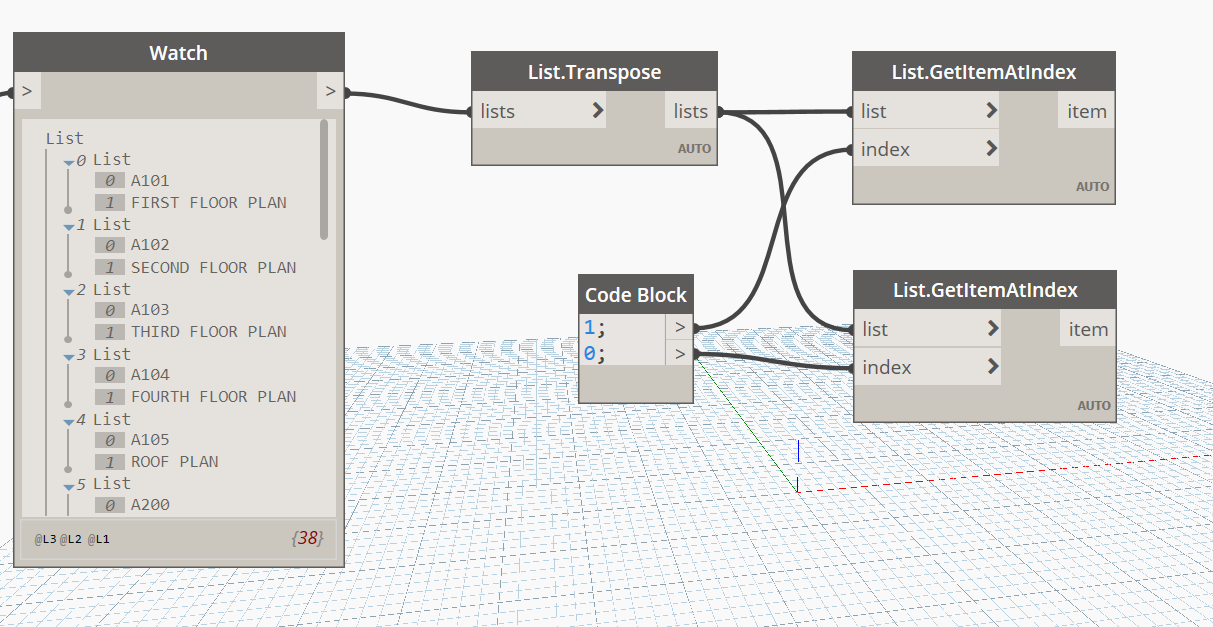
- Note that you can click on the part of the Node where it says ‘Auto’ and you will get a dropdown list showing the information being passed along. In my graph, the List.GetItemAtIndex Node on the top has the sheet names and the one on the bottom has the sheet numbers. Basically all this step does is separate the main list into two separate lists of Sheet Names and Sheet Numbers. This is important in the next step.
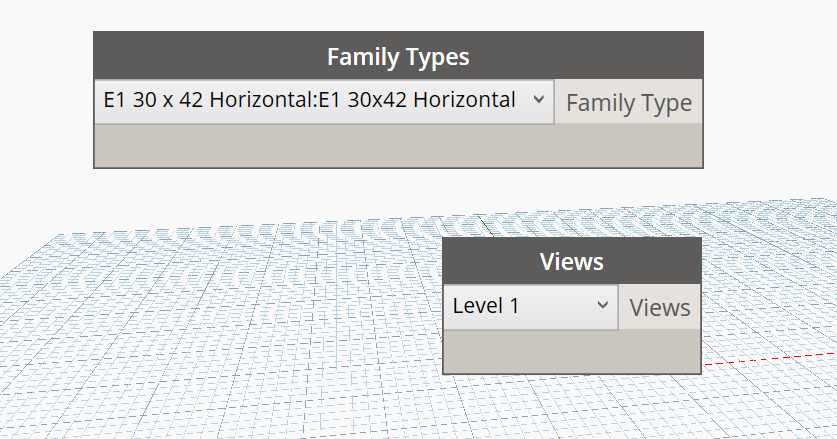
- We will also need these nodes as well. You can put them directly underneath the Code Block and ListGetItemAtIndex Nodes. You will also need to select the following items from the drop down menus as shown:
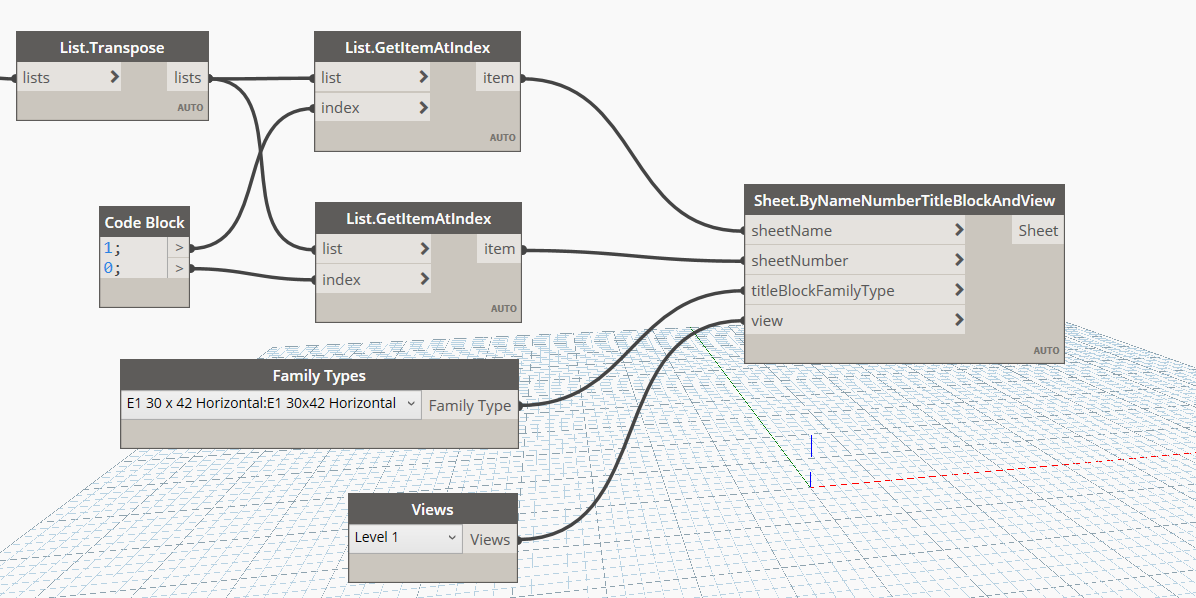
- Now get the Sheet.ByNameNumberTitleBlockAndView node and connect as shown:
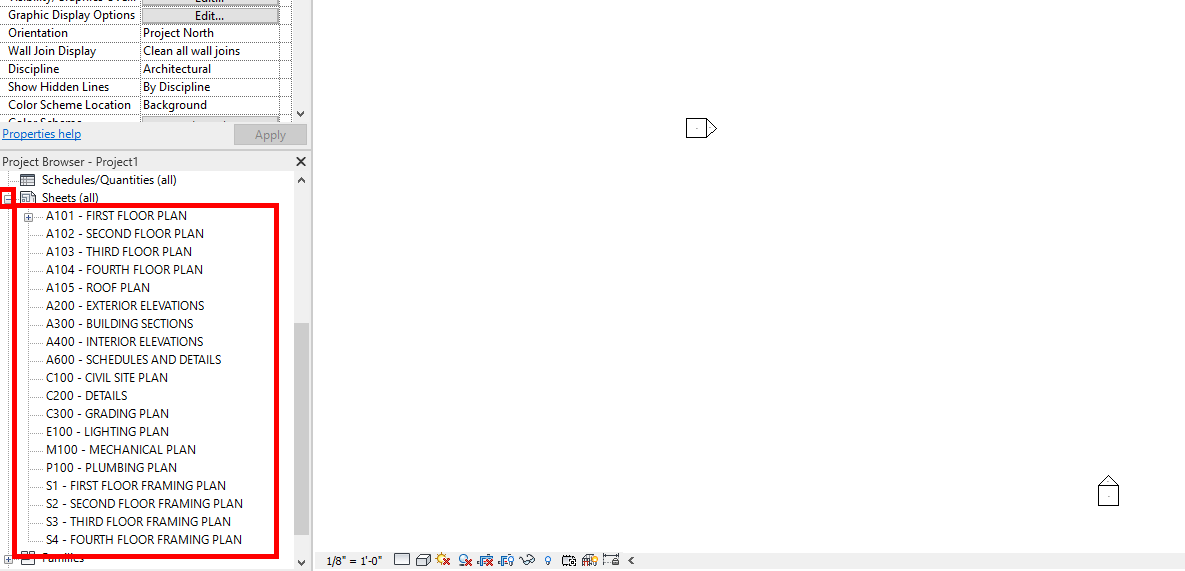
- Switch over to Revit and verify that your Sheets have been added. You might need to expand the plus sign next to Sheets in the Project Browser:
- Save your Dynamo Script, then close Dynamo. You can now save your Revit File and it will maintain the Sheets you added.


Comments