


In our recent webcast, Draining the Guesswork: What’s New for Stormwater Design in Civil 3D® 2027, we built a small cul-de-sac subdivision’s storm system from start to finish and used the 2027 enhancements along the way, from pulling rainfall data to running a full drainage analysis.
The big takeaway: the analysis runs inside Civil 3D, using the native objects you already create. No separate install, no jumping between applications. If you’re on Civil 3D 2027, everything shown is available to you today.
Here’s a recap of the workflow, with the tips worth bookmarking.
1. Start with the Right Rainfall Data
Good analysis starts with good inputs. If your municipality or state publishes rainfall data, use it. If not, NOAA’s Precipitation Frequency Data Server is a reliable source. Select your state, search by location, latitude/longitude or station, and you’ll get rainfall depths by return period (1-, 2-, 5-, 10-, 25-, 100-year) and duration.
For most stormwater work, you’re after the 24-hour storm at whichever return periods your reviewing agency requires. Pull those numbers before you open Civil 3D.
2. Build Your Storms Once in the Rainfall Manager
On the Analyze tab, open the drop-down under Analyze Drainage System and select Open Rainfall Manager. From there you can define rainfall distributions, known rainfall depths, and intensity-duration-frequency data.
Click Add Rainfall Event, enter the return period, choose a distribution (we used Type II), and key in the duration and depth from NOAA. Add as many events as your project needs. In the webcast, that meant the 2-, 10-, 25- and 100-year storms.
|
Work smarter: export a .rain file Once your events are set, export them as a .rain file. Save it to a shared location with a clear name, and anyone on your team can import it into the next project in that same area. Build it once, reuse it for years. |
3. Clean Up Your Parts List First
Before laying out a system, take a look at your storm structures parts list (Settings tab > Pipe Network > Parts Lists). Out of the box, it’s a long list, and few teams use more than a handful of those structures. For new staff, it can be overwhelming.
|
A quick PSA from Hagerman Trim your parts list to what your team actually uses and save it in your template. It’s easy to add structures back later. For the simplest setup, consider structures with no frames: they carry all the data the analysis needs. |
4. Tell Your Inlets What They Are
This is the step that trips people up. Open Structure Properties and, under Part Data, set the Structure Type: grate inlet, curb inlet, combination, outfall or manhole. Until you do, the new Gutter Details and Inlet Details sections stay hidden.
Once they appear, fill in everything you know: hydraulic properties, gutter width and slope, and inlet condition (sag, sump, depressed or flat). There’s also a clogging factor, so you can model an inlet running below full efficiency. Entering 10% means the inlet operates at 90%.
Repeat for every inlet, structure and outfall in the system. The analysis is only as good as the data behind it.
5. Dial In Your Catchments
Each catchment feeds an inlet, and catchment properties drive your runoff numbers. Right-click a catchment and open Catchment Properties to set:
- Runoff coefficient for the drainage area.
- Reference object, confirming the catchment is tied to the correct inlet. Pick it from the drawing if it isn’t.
- Flow path, generated from your surface or created from a polyline.
- Time of concentration, either user-defined or calculated with TR-55, Kirpich or FAA methods. TR-55 reads from the flow path you created.
6. Create Channels from Feature Lines
Create Channel lives on the Home tab in the Create Design panel. New in 2027, channels (and a number of other objects) can be built from a feature line, not just an alignment and profile. The channel grade reads directly from the feature line’s start and end elevations.
In the Sections tab, set your bottom width, side slopes and depth, with a real-time preview as you go. The webcast example used 4:1 side slopes as an easier-to-climb, safety-minded choice.
If feature lines are new to your team, our Civil 3D Intermediate Grading course covers them in depth, along with detention basins and other site grading work.
|
Heads up There’s no option to create a new layer inside the channel dialog. Set up the layer before you start the command. |
7. Build the Pond, and Fix the “Out of Date” Error
Ponds can be created from an object (such as a top-of-bank feature line) or on the fly. Once the pond exists, set it as the outlet in your channel’s analysis data, and Civil 3D connects the channel to the top of bank automatically.
|
Seeing “operation is blocked”? If Civil 3D says the drainage objects aren’t compatible with the current version, select the feature line you’re building from, open its properties, and use the pull-down next to “This object is out of date” to upgrade it. Then create your pond or channel as usual. |
8. Run the Analysis
With rainfall, inlets, catchments, channel and pond in place, go to Analyze > Analyze Drainage System. Processing runs in the cloud and takes anywhere from seconds to a couple of minutes depending on site size.
Results show the rainfall sets and events used, each catchment’s connected structure, contributing area, max flow and total inflow volume. Everything stays dynamic: adjust your design, re-run, and compare. You can also export the results to a file for documentation or review.
The Bottom Line
Civil 3D 2027 keeps stormwater design and analysis in one place, built on objects your team already knows. The payoff comes from setup: a shared rainfall file, a lean parts list, and complete inlet and catchment data. Get those right, and the analysis does the heavy lifting.
Watch the Full Recording
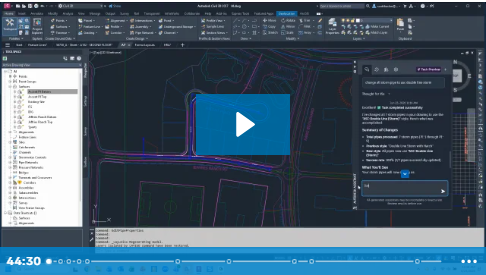
Want to see each step on screen? Watch the full Draining the Guesswork recording:
If you’re planning your move to Civil 3D 2027 or want your team up to speed on the new drainage workflow, talk with Hagerman’s AEC specialists. We’ll help you map out an upgrade and the Civil 3D training to go with it.
Looking for more sessions like this one? Browse our Hagerman webcasts.



Comments