If you have ever wondered how to get started with Autodesk Vault Data Standard, here are some steps to get you going.
The Vault Data Standard installation files can be found within the Vault Client installation. It is a fast and easy installation:

Three installations will modify your current Vault client, Inventor, and AutoCAD. There will now be Data Standard dialog boxes in those three environments.
Next, if necessary, you will create and activate a Vault Project inside Inventor. If you have an existing Vault and Vault project, you can continue using that Vault and Vault project.
Here is an example of a new Vault Project:

The next file that you save in Autodesk Inventor will call up the default Vault Data Standard save dialog box, giving you access to many Data Standard default properties.
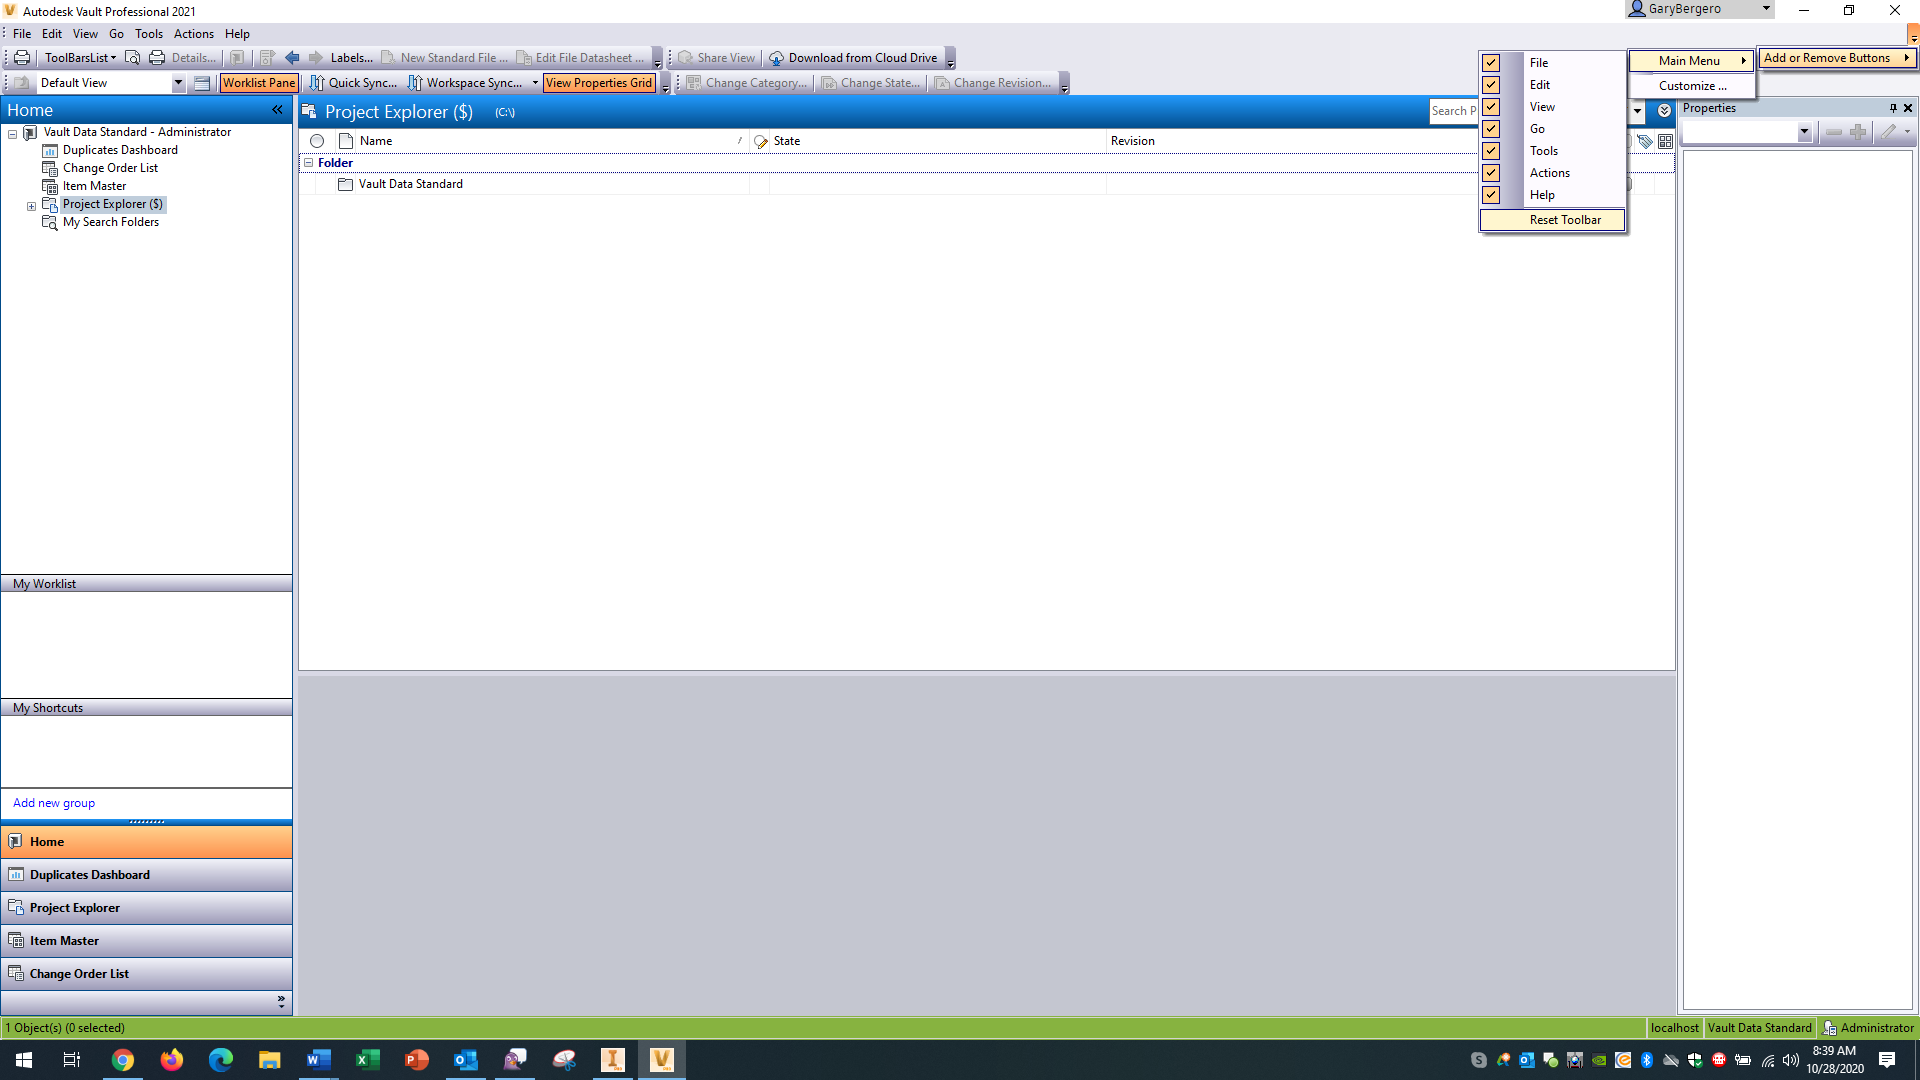
You will now notice that Vault Data Standard does change your Vault client interface:

You will probably want to turn on the original Vault main toolbar to access your common Vault commands. To do that, choose “Reset Toolbar” in this next screen capture:
Now, you have access to many more Vault commands.

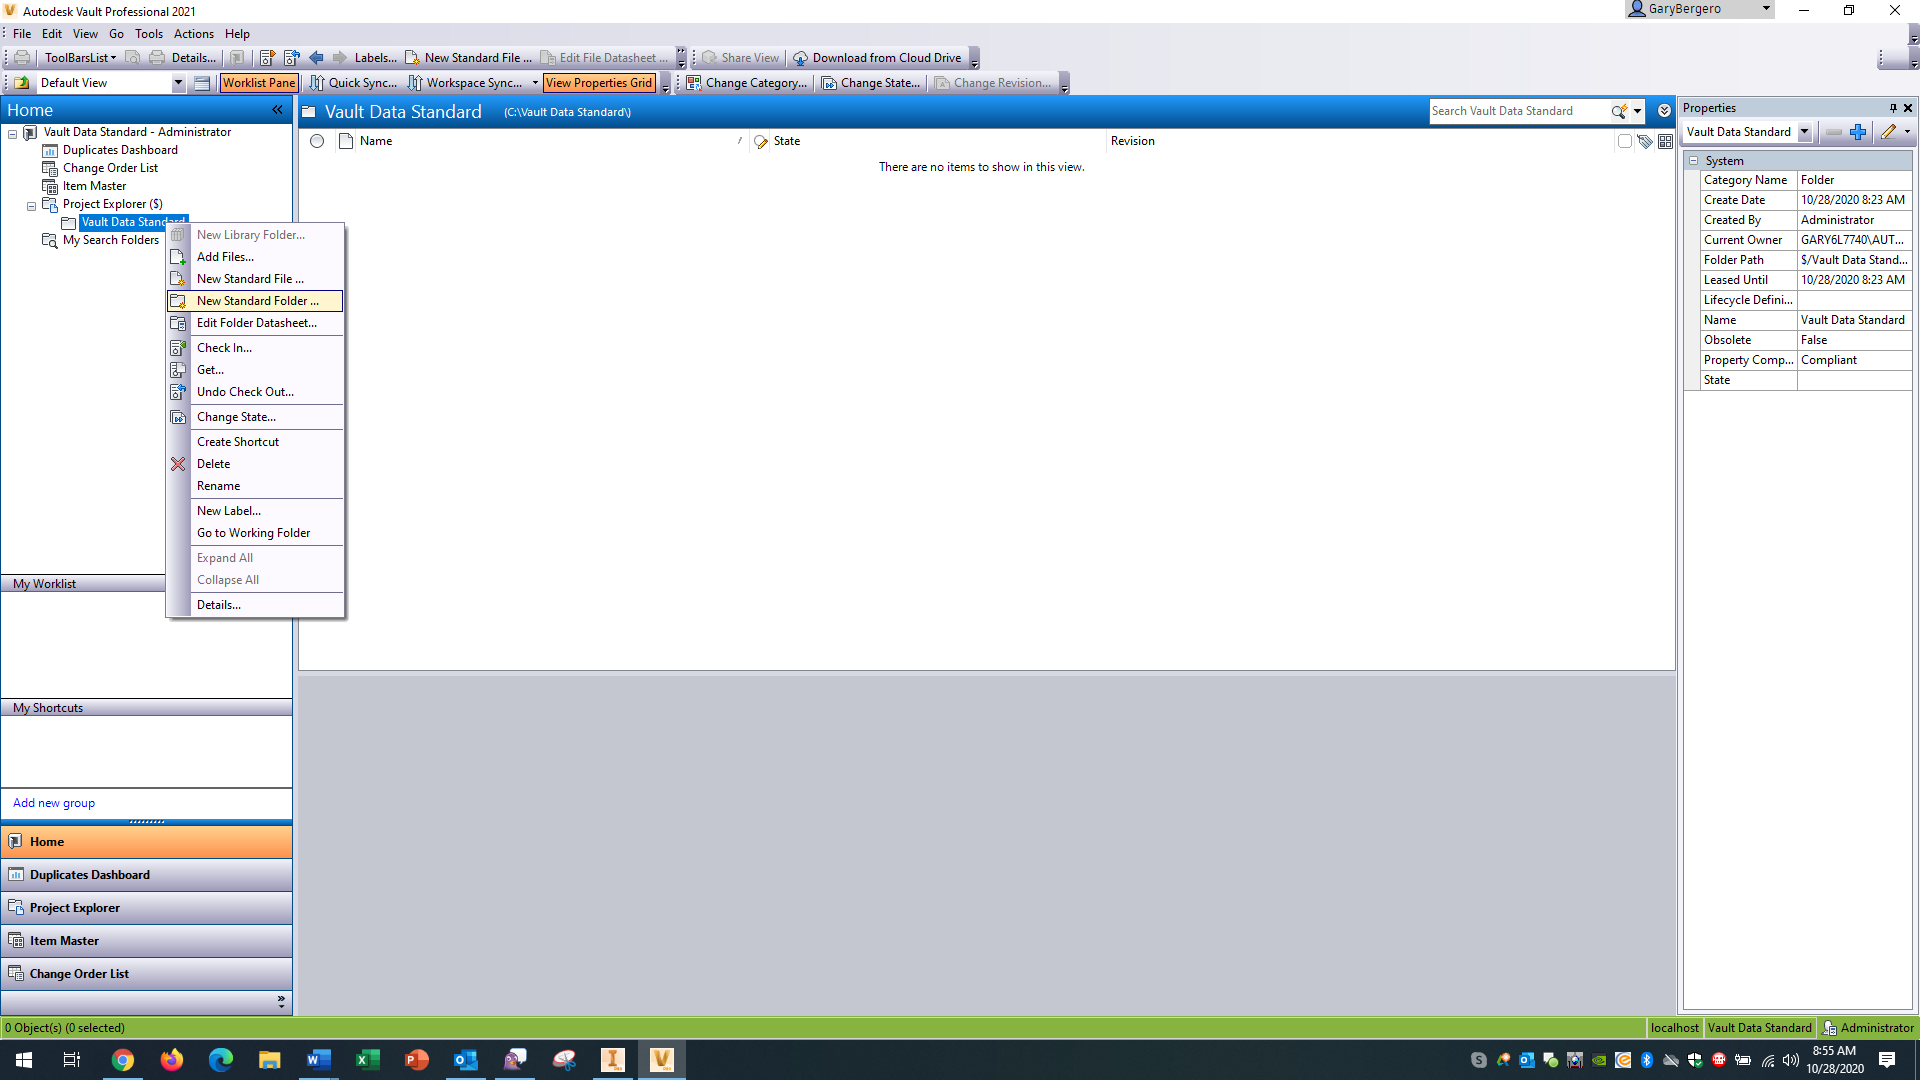
Next, inside Vault client, you might want to create some main Data Standard folders for your products. For Example, “Bracket Assembly." After creating a folder like this example, the folder is now on a list of acceptable folders when you save your next Inventor file. That provides consistency for your company standards. In Vault client, you right-click your main folder and choose "New Standard Folder." See screen capture:
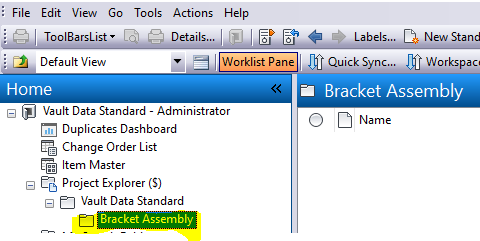
The Vault client result looks like this:
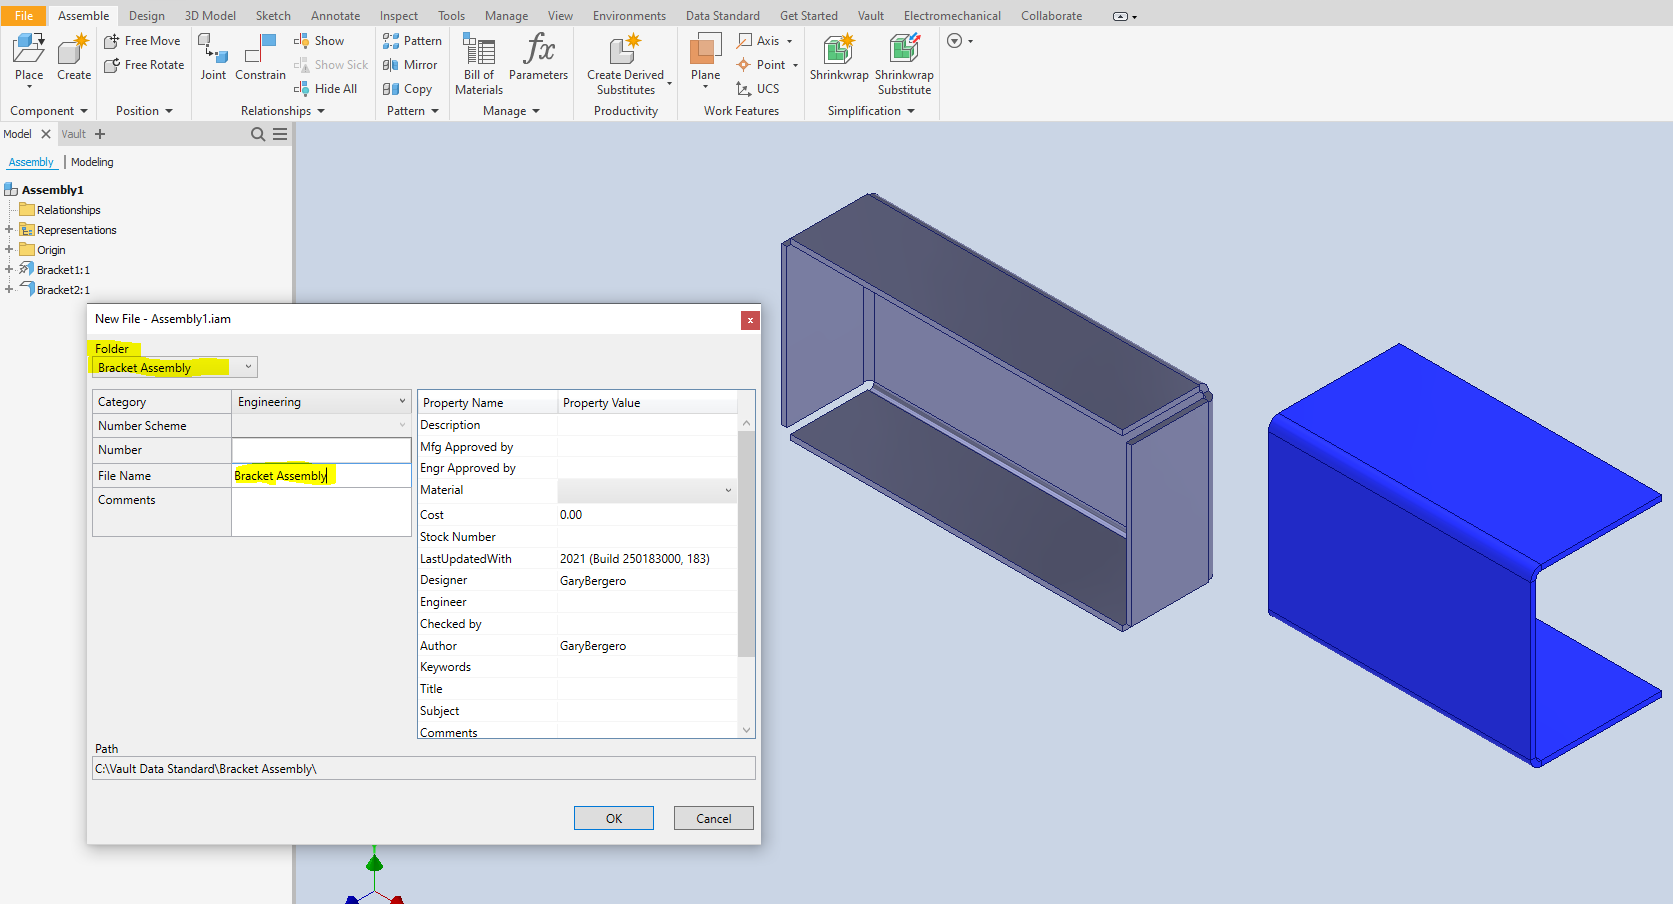
Now, if you go over to Inventor and create an assembly, the Data Standard save dialog box will have access to your new Data Standard folder:
As soon as you save your Inventor file, you immediately get the Vault “Check In” dialog box.
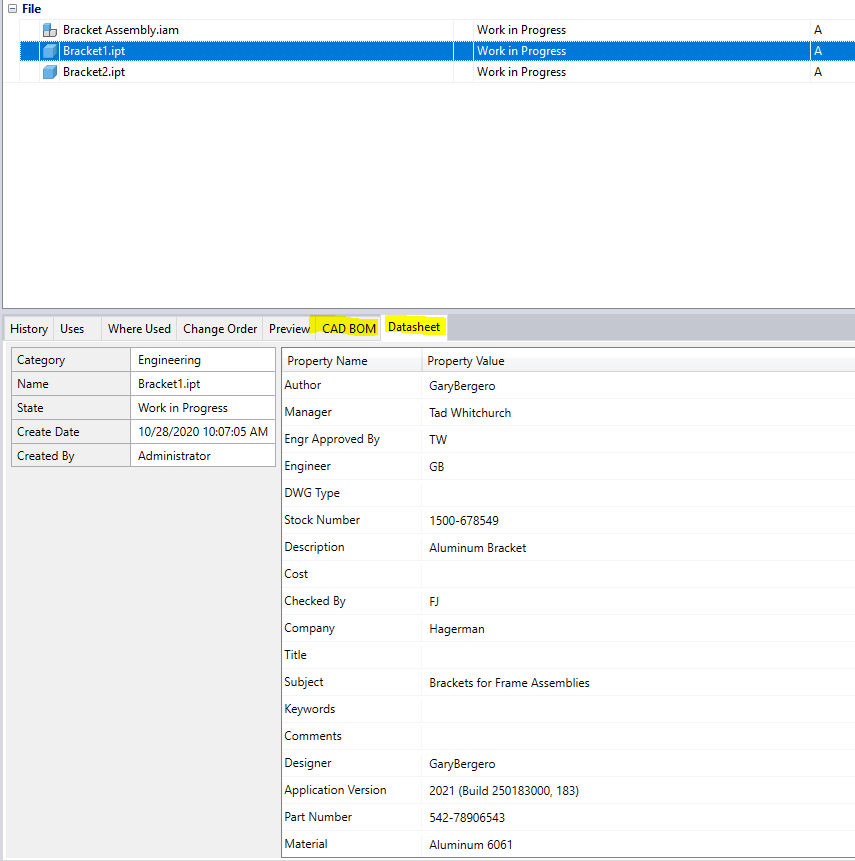
After checking in to the Vault, you have some new tabs of useful information such as “Datasheet”:
A nice benefit of Vault Data Standard is the ability to require properties to be filled before a file is saved. That makes all your files consistent with company properties. Here is an example of making the “Title” property required for all Inventor files.
In Vault client, navigate to Tools/Administration/Vault Settings. Go to "Behaviors/Properties." Highlight the "Title" property and choose "Edit…"
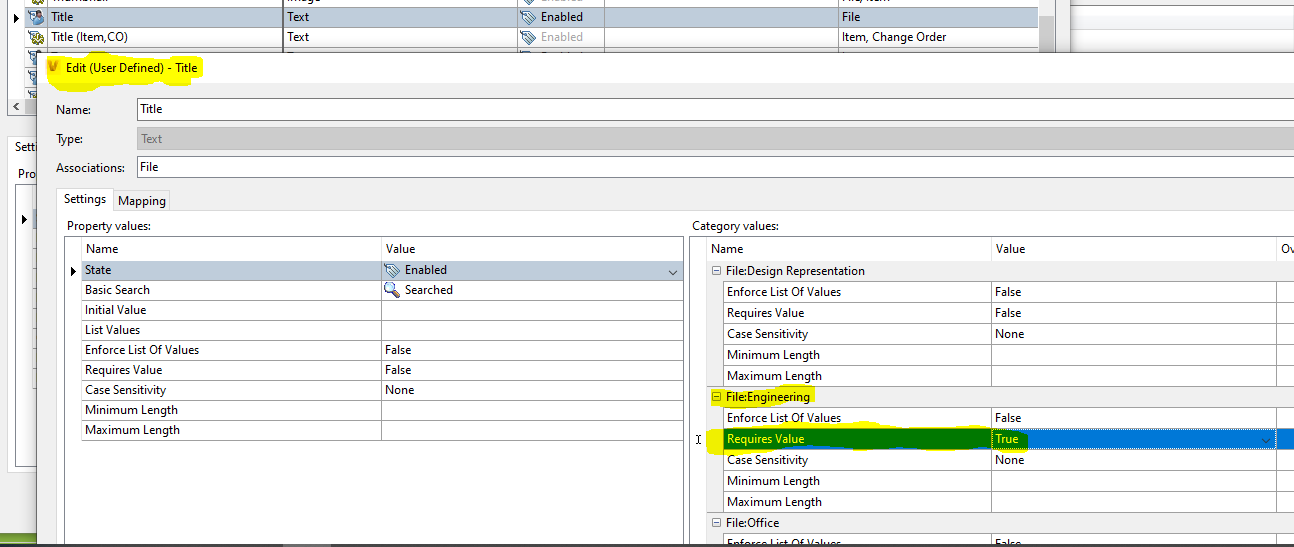
In this example, the "Title" property is required to be filled in during a file save command for all files in the "Engineering" category.
Now, inside Inventor, here is the Data Standard dialog box while saving an Inventor file:
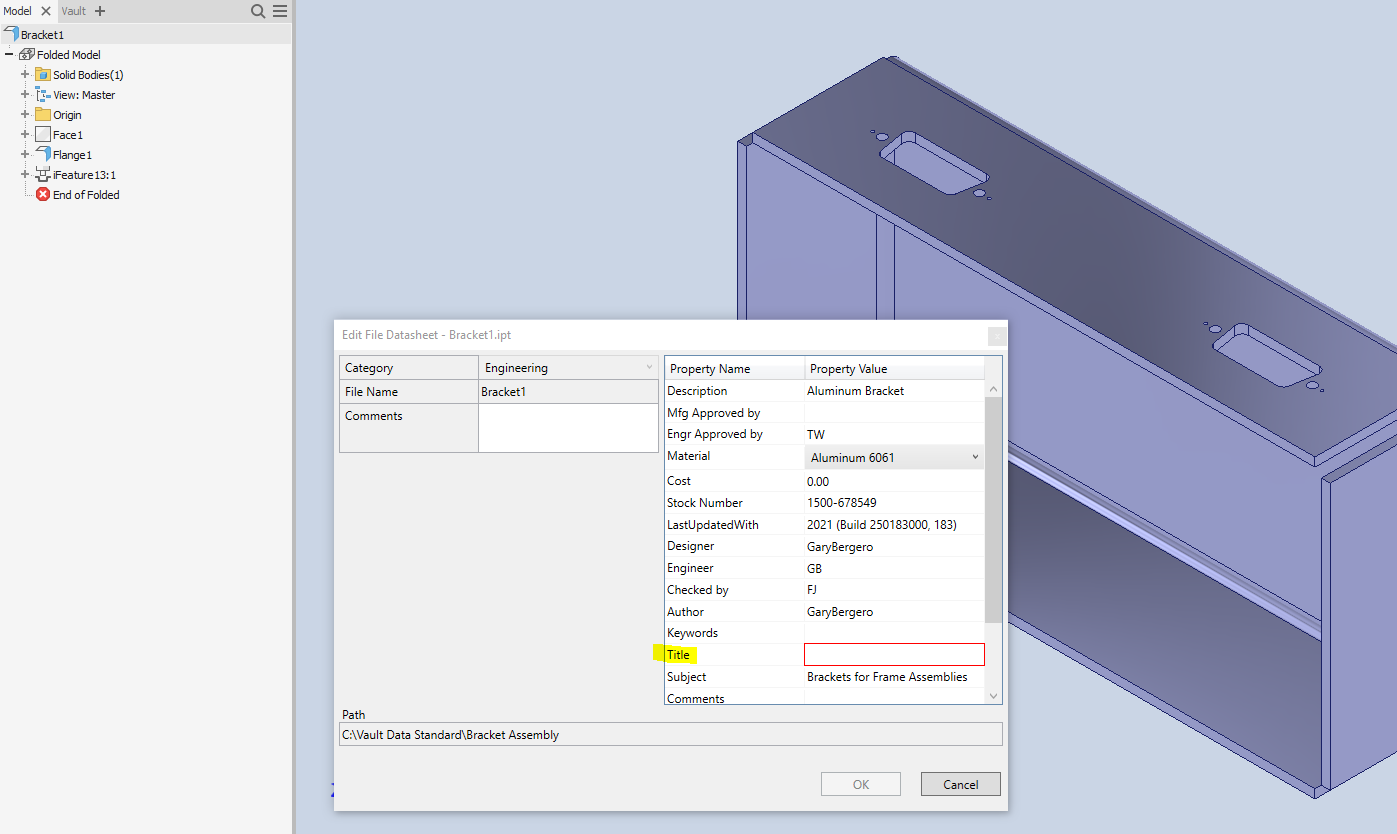
Notice that the "Title" value field is highlighted in red and that the "OK" button is greyed out. The Title field must be filled in to complete this command, which provides consistency or a "Data Standard" for all of your files.
I hope that this blog article will get you started on Autodesk Vault Data Standard and that you have seen some of the key benefits.

Comments