Intro
Have you ever tried to open a project in AutoCAD Plant 3D/P&ID and not been able to? As projects are developed we may encounter errors or difficulty opening files. Sometimes things work fine for some people working on the project, but not others. When a project is networked, these inconsistencies in performance can occur more frequently. So what’s the problem?
When a project is stored on a network, some data is stored on the local computer in what we call the local data cache, which is simply a folder on the computer. When the folder hasn’t been emptied in a while we can run into issues opening the project. There is a program that ships with the product and is located in the install folder known as PnPLocalDataCachePurger.exe. While this is a nice tool to have, it’s not right at our fingertips by default. As a result, many of us forget that it’s there and forget to use it often enough.
Follow this link to read more about this issue and what to do if doing it manually.
What I am sharing with you here is a way to automate the clearing of the data cache every time you launch Plant 3D. It involves a very small batch file accompanied by a new shortcut so that you can make it look like the existing one while keeping the automation under the hood. Don’t worry, you don’t need to become an expert on batch files; just the willingness to take a few minutes to eliminate this problem from ever happening again.
Step 1: Create the Batch File
Open Notepad and enter the following. You can copy/paste from here if you like. In a moment, each line will be explained.
@echo off
if not DEFINED IS_MINIMIZED set IS_MINIMIZED=1 && start "" /min "%~dpnx0" %* && exit
del /Q %appdata%\Autodesk\PnPPersistentCache\*.*
start "" "C:\Program Files\Autodesk\AutoCAD 2018\acad.exe" /product PLNT3D /language "en-US"
exit
Save the file with a name like LaunchPlant3D201x-CachePurger.bat. It must have the extension .bat, so double-check the file name after saving. Do not save it the same folder as the install files. When Plant 3D gets uninstalled you want to be able to reuse it with the next release so be sure to choose a different folder. For this example, we will save the file to C:\Autodesk.
The Batch File Explained
You don’t have to become an expert to write this batch file but understanding what’s in it never hurts.
The first line suppresses all feedback in the command window that appears except for what is programmed inside the batch file.
The second line forces the command window to start minimized so there won’t be a large black window appearing on the desktop.
The third line empties the data cache folder. If you run the program that comes with Plant 3D (PnPLocalDataCachePurger.exe), this is the folder that gets cleared. The reason for this is because running it manually forces you to click through two dialogs before you can launch Plant 3D. By clearing the folder directly there will be no dialogs to deal with.
The fourth line launches Plant 3D.
The fifth line provides a clean exit of the batch file.
Step 2: Create the Shortcut
Now that you have created the batch file, let’s create a shortcut. In folder C:\Autodesk, right-click the batch file and choose Create Shortcut. Rename the shortcut to have the same name as the batch file, in this example we’ll name it AutoCAD Plant 3D 2018 - Cache Purger.lnk.
After you have created the shortcut, you can move anywhere you want. Typically we find our shortcuts on the desktop so that’s where we’ll put this one. The original shortcut for Plant 3D is probably still on the desktop. Eventually we will delete it, but not yet as it is needed for the next step.
Step 3: Replace the Shortcut Icon
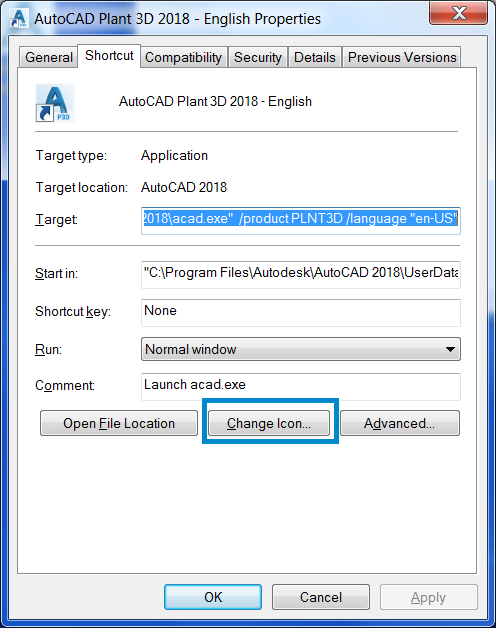
Locate the original shortcut for Plant 3D. Right-click on it and choose Properties. Then, choose Change Icon.
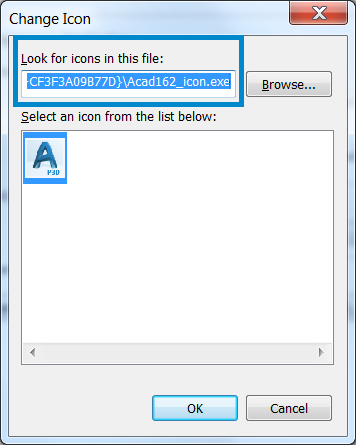
In the Change Icon dialog, clipboard copy (CTRL+C) the entire path in the ‘Look for icons in this file’ box.
Click OK twice to close both dialogs.
Next, right-click on the new shortcut > Properties > Change Icon. The following dialog may appear:

Click OK.
Clear the ‘Look for icons in this file’ box and then paste (CTRL+V) the new path into it, and click OK to close all dialogs.
Now the new shortcut to your ‘automated launcher’ will look just like the original and the cache will be cleared automatically when launching Plant 3D.
I hope this helps!


Comments