Before You Begin
-
Before installing your Autodesk software, prepare your system and gather all the information you will need
Pre-requisites
- Check system requirements. Each Autodesk software has different requirements, please check each software you plan to install
- Verify you are using Autodesk certified and recommended computer hardware
Get Appropriate Permissions
- You will need administrative rights to install. Verify with your IT department
- For Windows verification:
- Open Control Panel User Accounts Manage User Accounts
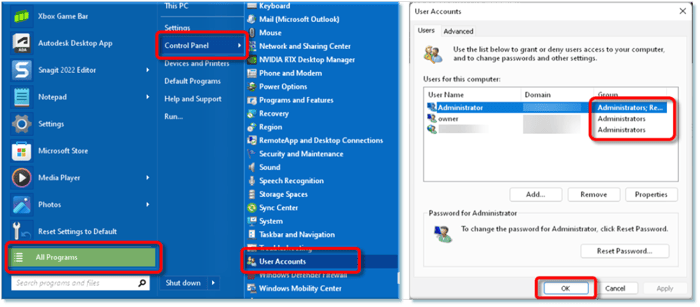
- Open Control Panel User Accounts Manage User Accounts
- Change User Account Control Settings to “Never notify”
NOTE: For MacOs verification: open System Preferences Users & Groups
- Install system updates
- Temporarily disable antivirus programs, they often will interfere with the installation
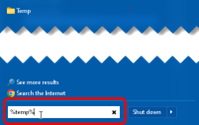
- Delete all files that can be deleted from your temp directory. Typing %temp% in the start box will take you to the proper location to do this
- Restart your computer before beginning the Autodesk installation guide to avoid potential issues
- Close all running Autodesk applications, except for the Autodesk Installer
Assigning Users
- Assigning users to Autodesk software, needs to be done by either the Autodesk Contract Manager (typically, this is the person in charge of purchasing the software), Primary Administrator or the Secondary Administrator
- In some cases, the Primary Administrator will be aware that they will need to assign software to users. However, you may still need to contact them
- The Primary Administrator will need to login to their Autodesk Account here: https://manage.autodesk.com
Signing In
Existing Account
- Already have an Autodesk Account? Sign in using your email address and password
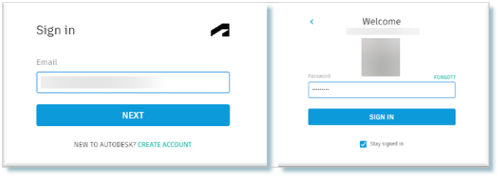
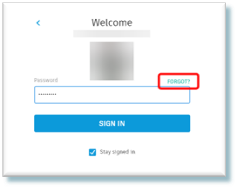
- Have an existing account, but forgot your password? Click FORGOT on the password page to have an email sent allowing you to reset your password
New Account
- Click CREATE ACCOUNT at the Sign In page and follow the prompts for information needed
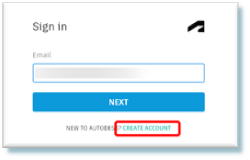
NOTE: Autodesk automatically assigns new software to the Contract Manager/Primary Administrator.
- If you are the Contract Manager/Primary Administrator, be sure that you do not have unnecessary software assigned to you
- If you are not the Contract Manager/Primary Administrator, contact them to make sure the appropriate software has been assigned to you
User Management
- Click the following link for a short video tutorial, which walks you through the process of adding a user: https://knowledge.autodesk.com/customer-service/account-management/users-software/user-management
Downloading & Installation
- If you're wondering how to download Autodesk software, the installation files for your Autodesk products are available in your Autodesk Account. These files, including trial versions, are full working versions of the software and are not add-ons or upgrades for previous versions
- Product installation varies depending on which method you choose:
- Simple download from the Autodesk account at manage.autodesk.com
- Custom Install from the Autodesk account to configure the installer before downloading/installing
- Download and install from the Autodesk Desktop App. Don’t have the Desktop App? Download it here: https://www.autodesk.com/desktop-app
Simple Download
- Sign in to your Autodesk account
- From the products and Services tab on the left side of your screen:
- Select All Product and Services
- Find your Autodesk software and select the correct version
- Click the pulldown arrow immediately to the right of Install
- Select Download
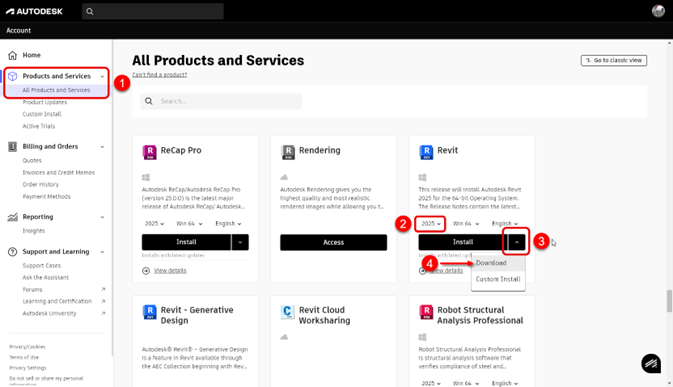
- If you choose the Download method, run the .EXE (Windows), mount the .DMG file (macOS) or extract the .TAR file (Linux) associated with your product and version
NOTE: For Windows, most 2022 and later software use the Autodesk Create Installer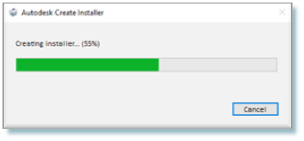
- Run the small .exe to create the installer in your downloads folder
NOTE: Versions earlier than 2022 will use self-extracting SFX files
- Read and accept the license agreement
- Click install (if you see a product language drop-down menu, select the language the user speaks)
- It is recommended the default installation path is used
- When install is complete, close the installer or open the software
NOTE: When you use the Install or Download method, installation of updates must complete before you can start the product
Custom Standalone Install
- Sign in to your Autodesk account at manage.autodesk.com
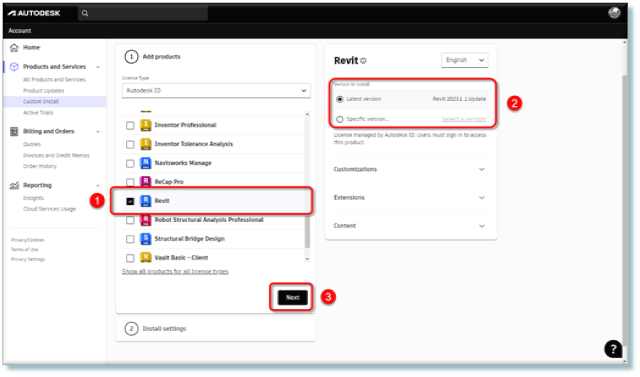
- Click Custom Install from the navigation pane
- Select the license type
- In the Add Products section, select one or more products to add to the custom package
- As you select products, you can customize them in the right panel
- After adding the products to the package, click Next to open the Enter Package Details section
- Here you can enter a package name. We recommend using a name that will help identify this package in a list
- Add a package description (optional)
- Click Install to install them on your own device or Select Deploy if you are planning on installing this package on multiple machines
- Expand Advanced Options to make additional package changes, i.e., changing the installation location, etc.
- Agree to Terms of Use
- Click Download to download the custom package to your Downloads folder
- Run the downloaded installer package
NOTE: Clicking Save will save the package without downloading, to be used at a later date
Download and Install From the Autodesk Desktop App
-
Open the Autodesk Desktop App from your desktop

- Find your Autodesk software for installation
- Read and agree to terms and conditions
- Click Install
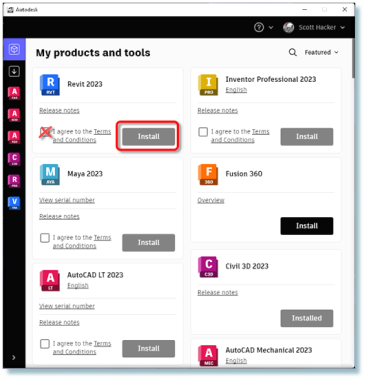
NOTE: It is recommended that you accept the default installation path
Activation
- If you are not already signed into your Autodesk account
- You will see the Let’s Get Started dialog box. Depending on the software and version, this dialog box may be different
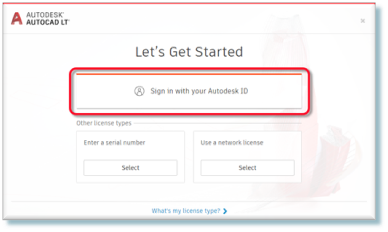
NOTE: As of May 7, 2020, Autodesk retired plans based on serial numbers and began assigning each subscription to a named user
- Click Sign in with your Autodesk ID
- Enter your Autodesk credentials:
- Autodesk ID/email
- Password
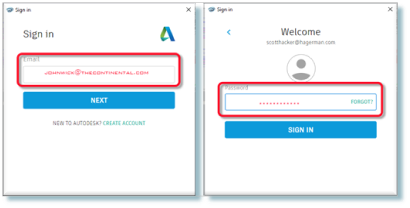
- Have an existing account, but forgot your password? Click FORGOT on the password page to have an email sent, allowing you to reset your password
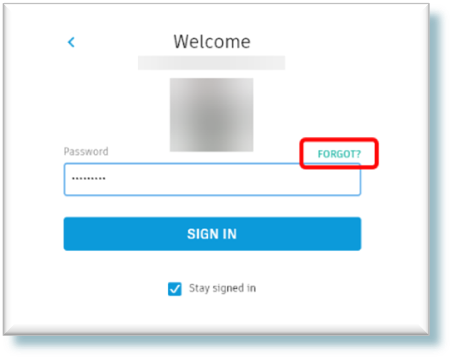
- Once you have both your login and password, enter them when prompted. Your Autodesk software will then open fully
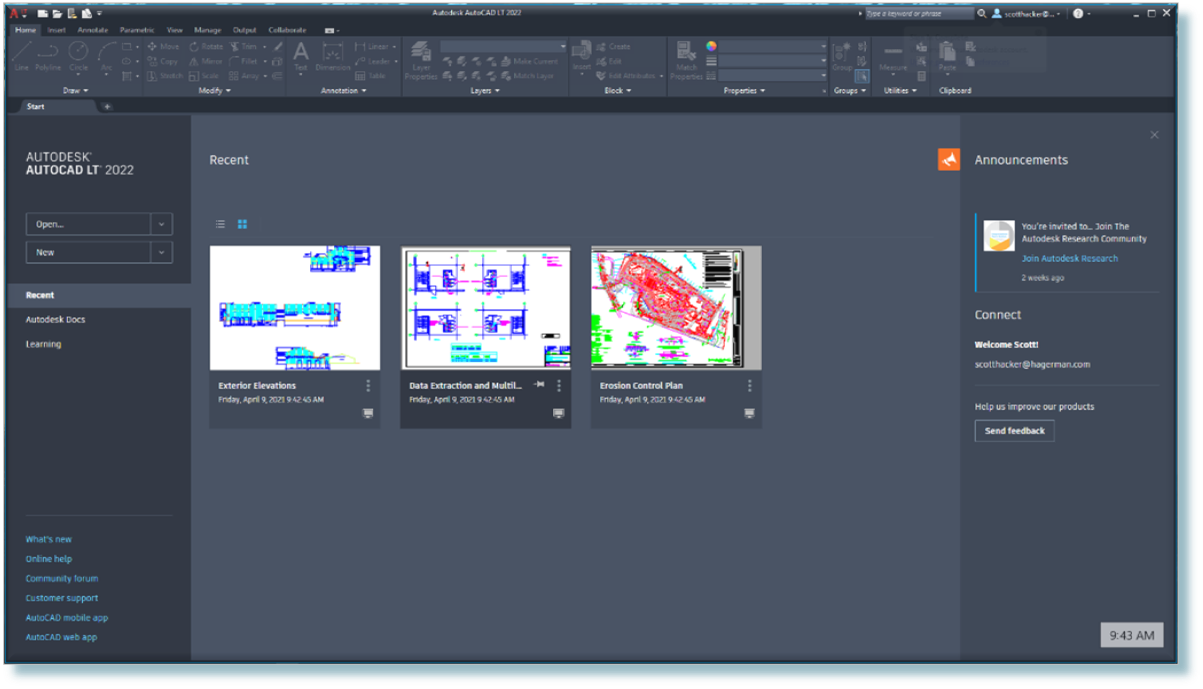
- To verify activation, select the pulldown arrow next to your name at the top right of the screen and click Manage License
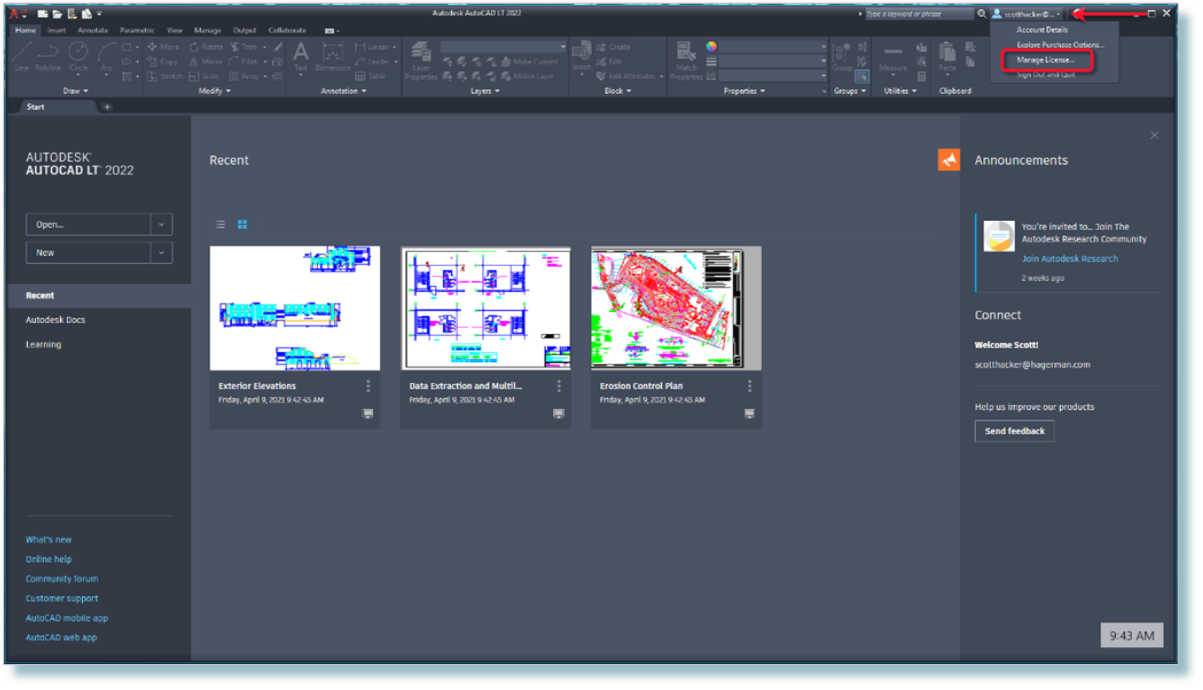
- The License Manager dialog box opens. If the software has been activated correctly, you will see User License: Commercial
- Need additional software information? Click the pulldown arrow to access Autodesk ID and License expiration date
- Close the dialog box, your Autodesk software has been activated and is ready for use.



Comments