“I’ve done my conceptual layout in Civil 3D®, is there any way to bring 2d linework like parking stripes, etc. into InfraWorks for contextual use in my model?” I’ve been asked this several times and the answer is a resounding “YES!” Not only can this be done, but the process is short and easy.
First we’ll start by opening both Civil 3D and InfraWorks (not necessary, but I like to see right away if I have the correct results).
As you can see, I’ve created a preliminary layout in Civil 3D, complete with islands and parking stripes.

I’ll zoom in a bit closer for clarity.
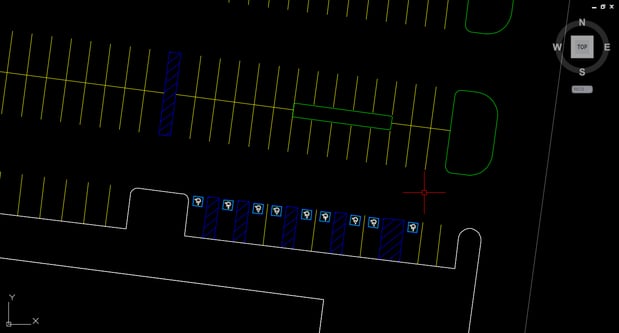
As you can see, I have parking stripes, as well as striping for accessible paths and spaces. Let’s start by exporting the parking stripes. I’ve placed the striping on separate layers, i.e. pkg-spaces and pkg-accessible, etc. This will help, not only in this process, but also in keeping your drawings better organized.
Select one of the parking stripes, Rt-click > Select Similar (Select Similar is a great AutoCAD tool that allows you to select objects of the same layer, color, etc. quickly).
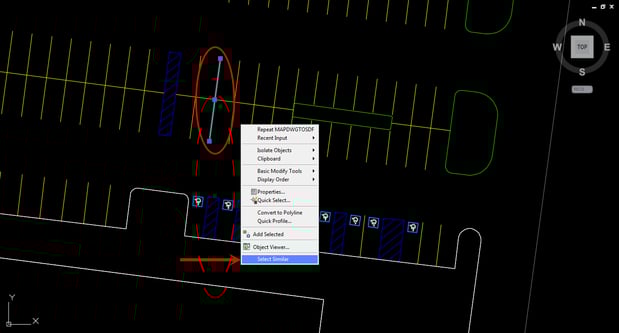
All of your standard parking stripes should be selected.
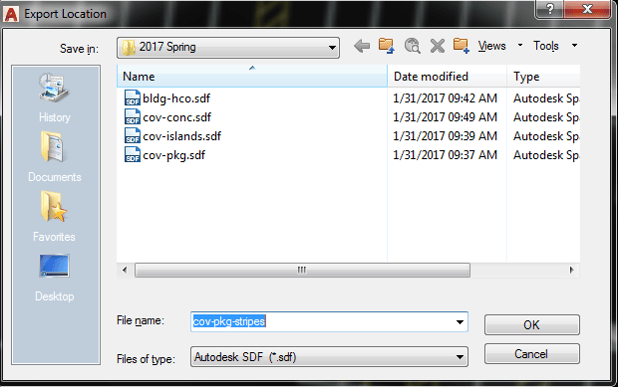
At the command line, type MAPDWGTOSDF. This will open the Export Location dialog box. Navigate to the appropriate folder and give your file a name, ex. Cov-pkg-stripes. Click OK.

The Export dialog box opens.

To select the striping, click the Select from Drawing icon. This takes you back to the drawing.


Because we used Select Similar prior to this, we can simply press Enter.
Back in the Export dialog, we can now click OK.
Time to head over to InfraWorks 360.
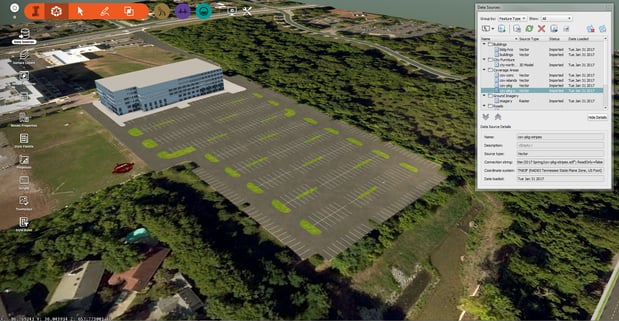
I’ve already placed my conceptual Coverage Areas (asphalt and grass islands) and my Building. If your Data Sources palette isn’t already open, go ahead and do so.
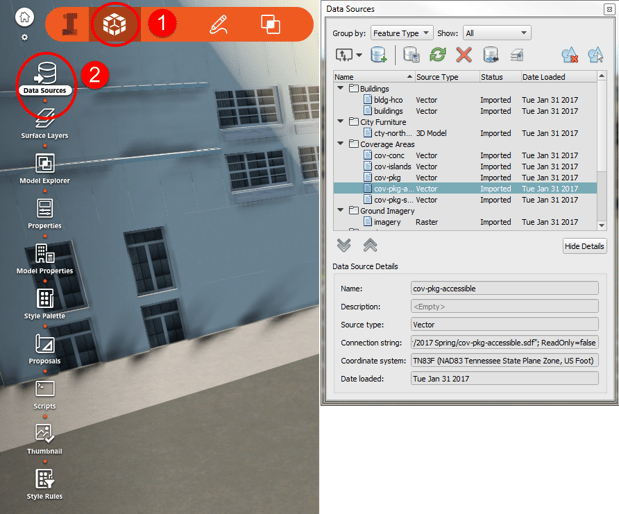
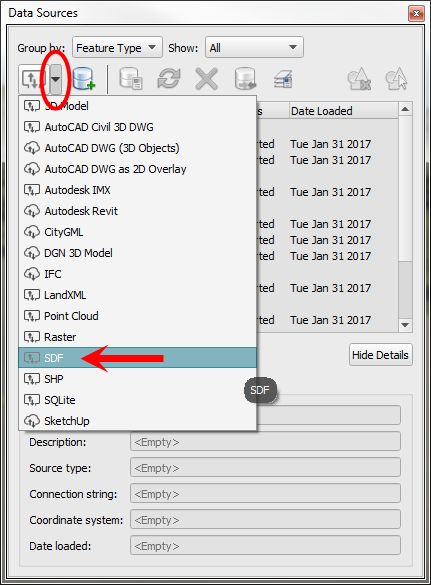
We want to go ahead and import the .sdf file that we created in Civil 3D. Click the pulldown arrow to access importable files/objects and click SDF.
Navigate to the .sdf file location, select the file and click OK.
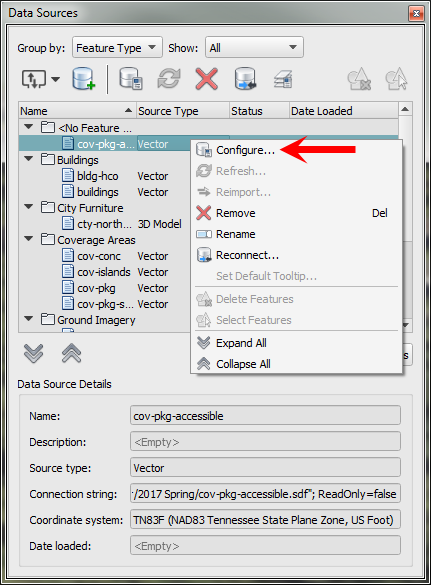
Now that the .sdf is available in InfraWorks, we need to configure it so that it will appear properly in our model. Rt-click the .sdf that we just brought in and select Configure.
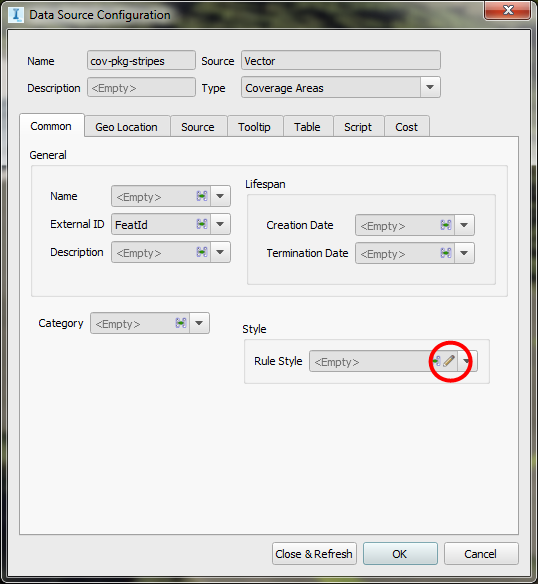
This will open the Data Source Configuration dialog box.
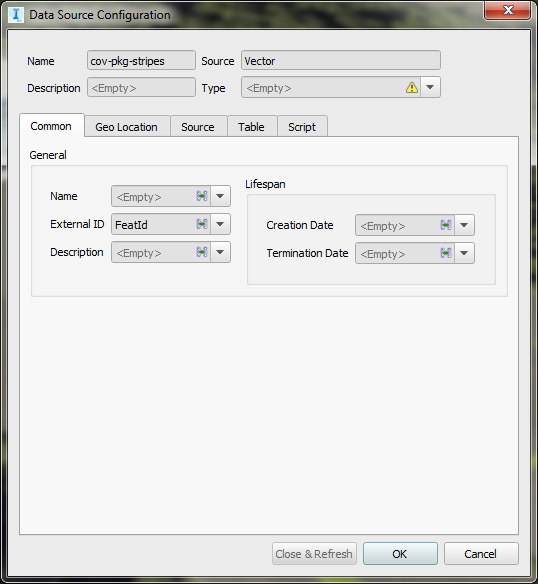
For type, click the pulldown arrow and select Coverage Areas.
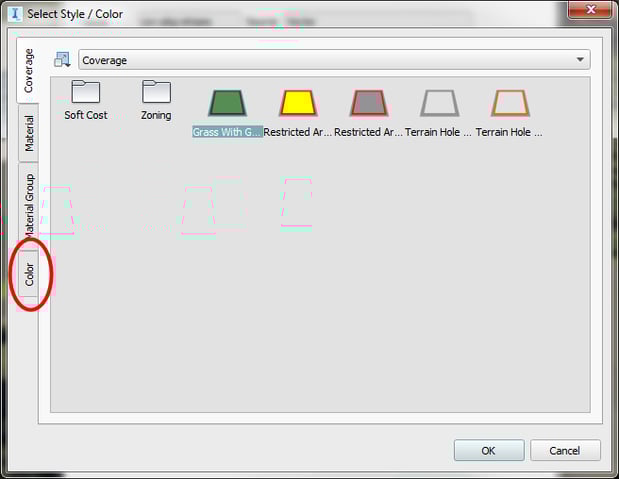
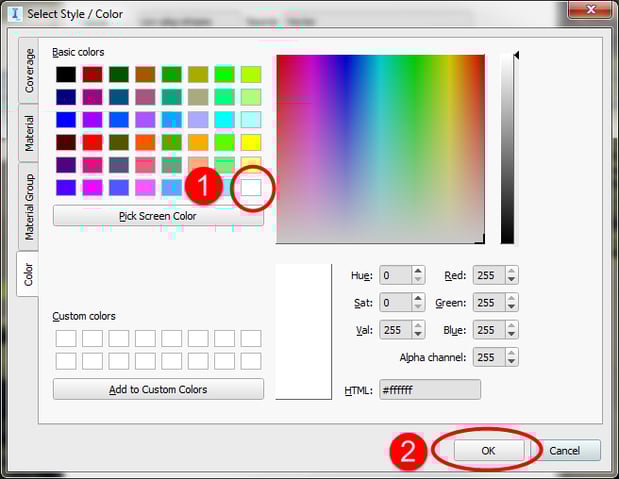
Next, we need to set a Rule Style. Because our stripes in this example are white, we’ll access the Color tab and select the bottom right corner square, then click OK.
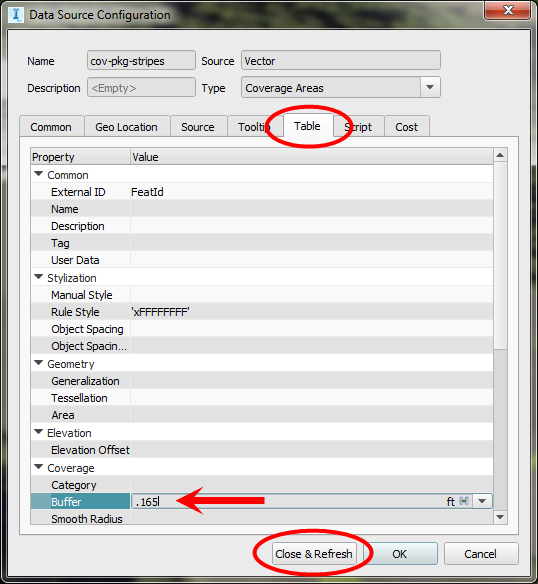
Back at the Data Source Configuration dialog box, click on the Source tab and under Draping Options, select Drape.

Lastly, we need to give our striping some width. This is standard parking lot striping, which is typically 4” (.33”) wide. Click the Table tab and input .165 in the value column of the Buffer property. Because InfraWorks sees only the “center” of the line initially, dividing the total needed by 2 provides the correct width. Click Close & Refresh.
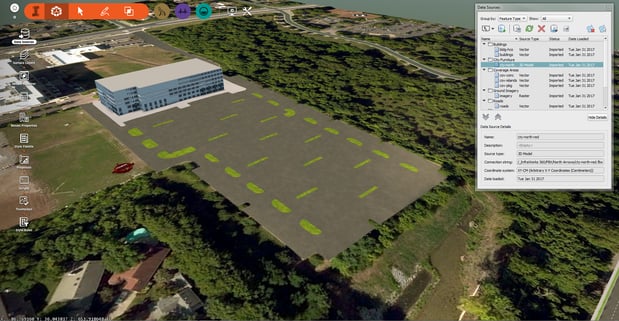
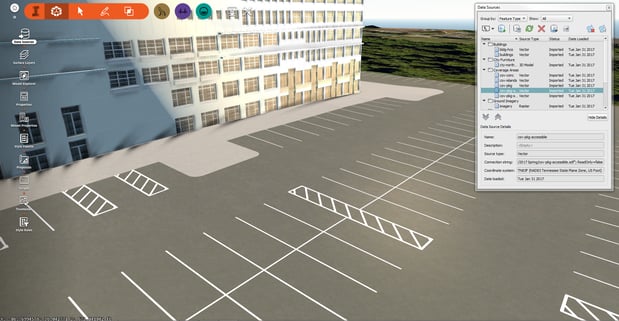
InfraWorks now displays all of the standard parking spaces in our model.
Inputting the accessible spaces and pathways will use the same procedure, except for the Buffer width. Accessible stripes will be 6” (.5”) wide and the Buffer value will be .25 (see below).
Once you’ve done a few of these, the process goes much quicker and can be done for other linear objects as well. The sky’s the limit!


Comments