Intro
Have you signed into your Autodesk® account recently? The page people go to the most has been updated…again. Updates are good; however, when you're looking for something specific that is not where it was last time you checked, you might get disoriented. We don't want you to feel that way. This article will highlight a few changes you may have already encountered and steer you where you need to go while providing some helpful tips along the way.
Example:
Let’s pretend you need to download the latest release of a product. You'd like to do it as quickly as possible and with as few steps.
Tip: Go directly to the product downloads
When I need to download a product, the only place I go is manage.autodesk.com. I recommend going to this site directly versus the main Autodesk site to reduce the number of places you have to navigate. If you can remember this web address, you can type it. If not, add it to your bookmarks.
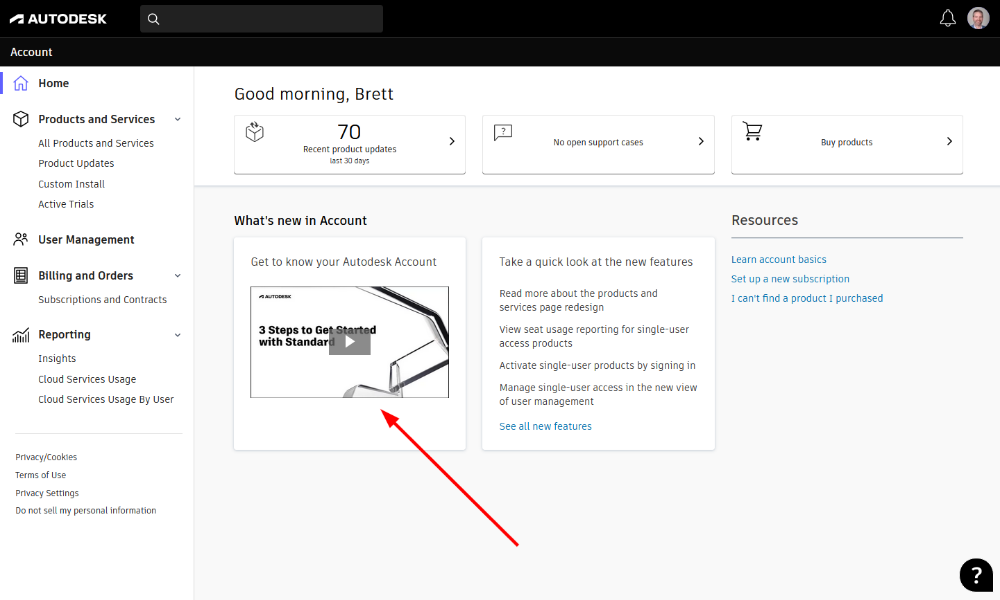
Once you’re signed in, you'll be on the Home page. If you haven't been here in a while or it's your first time, I recommend watching the video under Get To Know Your Autodesk Account. It's only 2-1/2 minutes long and is an excellent intro to the key things we do the most.
Now, for our example: you want to download a product, so you'll click All Products and Services on the left side of the page.
The New Products and Services Page
As you can see, this page has been reworked. For those of you who are familiar with your account, you can proceed at will. For those of you who prefer the way this used to look, you can click Go to classic view in the upper right. We will proceed with the new look from here, and my upcoming tips will serve you regardless.
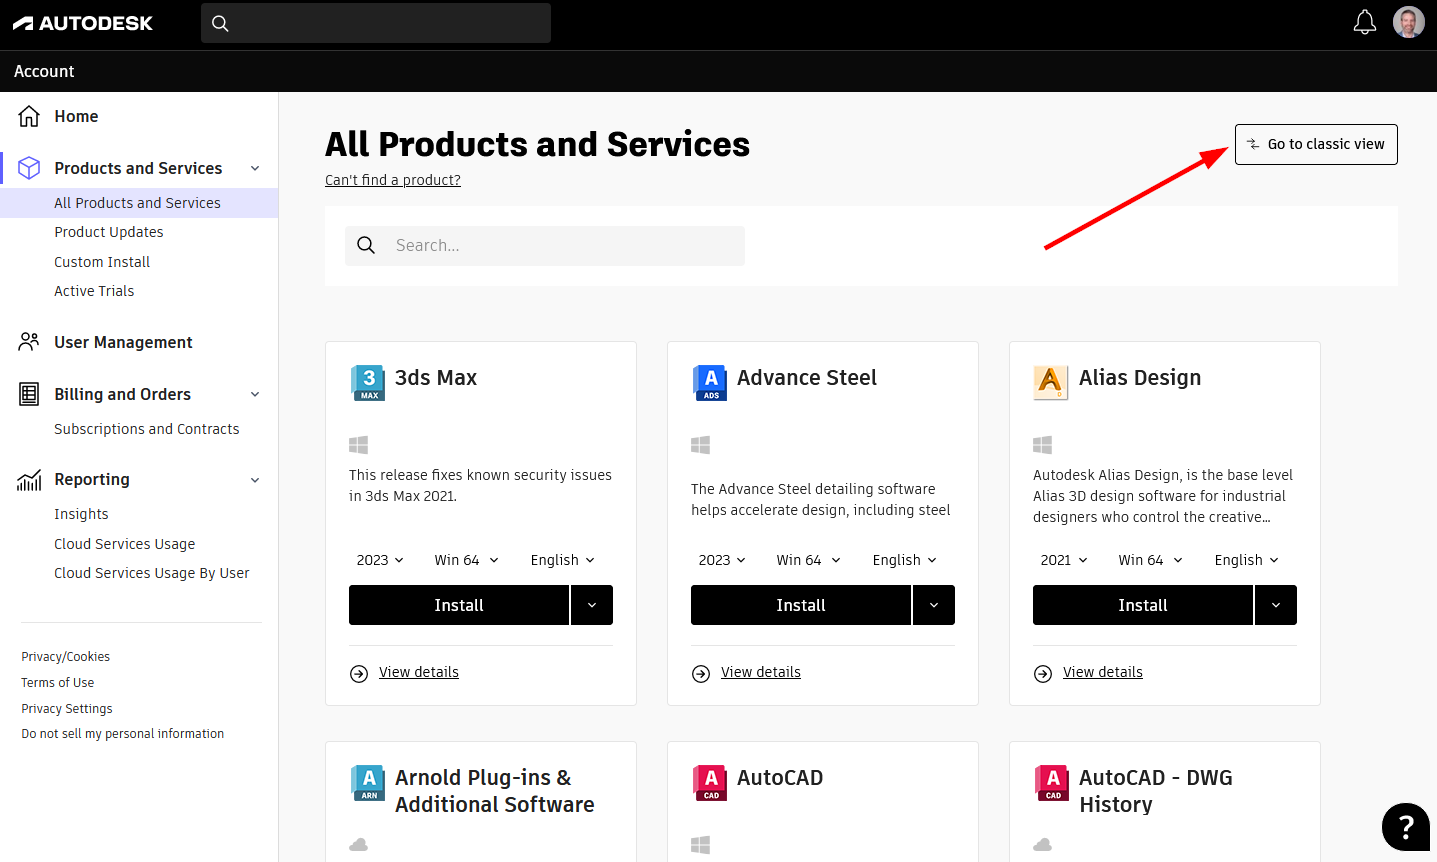
Tip: Use the Classic view if you don’t like the new look.
If you prefer the Classic view here, keep in mind that when you leave the page, sign out, or close the browser, this page will reset to the new view the next time you visit it.
Let's get ready to download a product. I'll go after 3ds Max®, but I'm not going to click the Install button yet. Let me explain.
While Autodesk is attempting to streamline and make things as simple and convenient as possible for all types of users, it seems that merely clicking the Install button here does not always work. Some customers use this method, but often the installation fails, or a component is missing or didn't install correctly. For this reason, I will click the down arrow and then click the Download option.
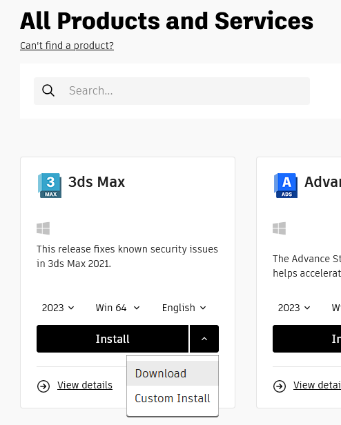
Tip: Download the install files first
Allow the product to fully download to the workstation before starting the installation. That way, all the necessary files will be on the computer versus behaving like a 'streaming' install.
The other option, Custom Install, is not covered here. More on that later.
Back to the Download option. After you choose it, at least one Save As dialog will open. The file(s) are broken up, with each one ending like this:
…_Win_64bit_00x_00x.sfx.exe
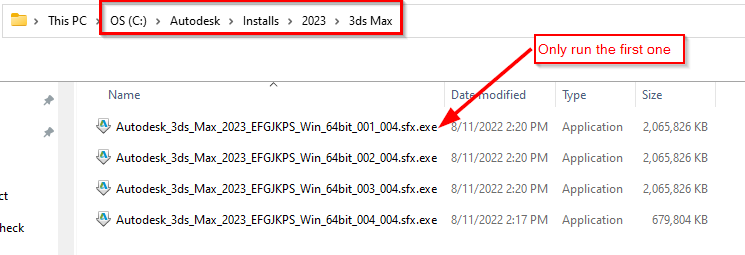
Since I’m using 3ds Max® as the example, there are four executable files. We know that because four separate Save As dialogs appeared. In the following figure, I moved the dialogs for clarity. Remember, these dialogs will open right on top of each other when you click Download. It's best to save them one at a time and let each finish before saving the next.
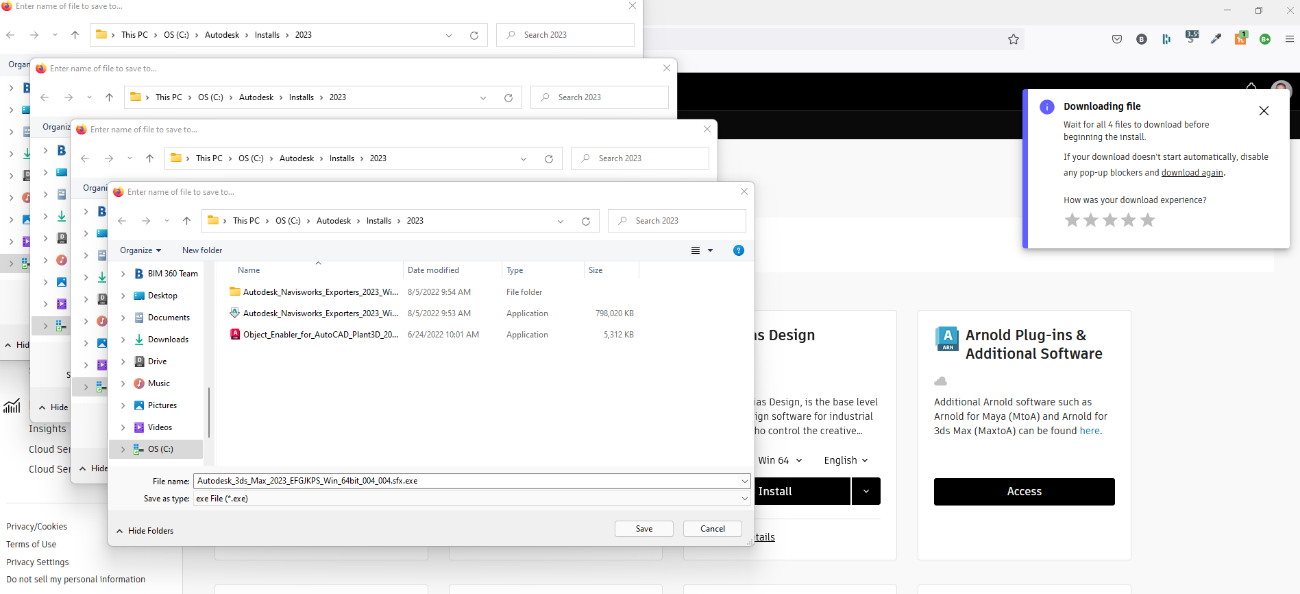
Next, save each file into the same folder. You’ll have to click Save in each dialog. After all the files are saved, you will double-click on the first one to launch the installer (the one ending in _001_00x.sfx.exe).
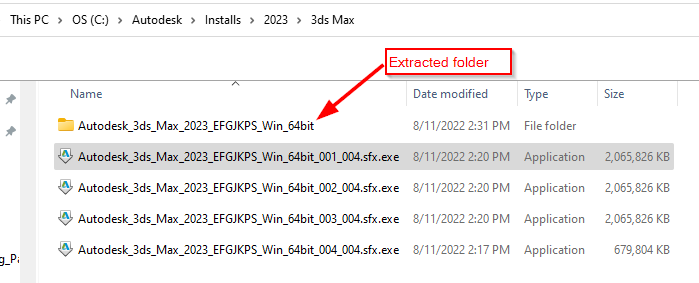
Here’s the folder I created for the 3ds Max® download to keep them together:
When you execute the first file, the Autodesk® Self-Extract will launch and prompt you to choose a folder in which to unpack the install. I typically use the same folder as above.
After the Self-Extract is finished, a new folder gets created containing the install files, and the installer will launch automatically. If it doesn't, you can go into the new folder and double-click the Setup.exe file to start it manually.
(Optional): After you run the install, you can delete the ‘sfx’ files to save space on your workstation.
That’s it for the new download method.
Review:
Here are the steps by themselves:
- Sign in at https://manage.autodesk.com
- Click All Products and Services.
- Locate the desired product and click the down arrow next to the Install
- Click Download.
- For each Save As dialog that opens, click Save. Store all the files in the same folder.
- After all the files have been downloaded, double-click the first executable, which will extract and launch the install (the one that ends in sfx.exe).
Remember that this will download the entire product, including all its content (US, metric, ISO, etc.), whether you want it or not. Plus, you'll still have to apply updates, hotfixes, and extensions via the Autodesk® Desktop App.
Tip: Use the Custom Install
The option, Custom Install, is not covered here, so I provided the link to that article below. I highly recommend exploring it because you can create a package that includes precisely what you need. Take Revit®, for instance. There are so many plugins and extensions, plus a long list of libraries depending on your language. You can leave them out if you don't need all those extras.
Here are my reasons for using the Custom Install tool.
- You can create a package that contains precisely what you need.
- Because you’ll most likely not need absolutely everything, the final install will be smaller in size and run faster.
- Since you can include the latest updates, hotfixes, extensions, and custom settings, you won’t have to run these individually from the Desktop App after installing or configuring the product.
- When the time comes to uninstall, the accompanying items that came with the installation will also be removed. Therefore you won’t have to go to the Windows Control Panel to do this one at a time. There will still be components that may need to be removed later, but the number will be reduced substantially.
This process can become a 'one-step' install (and removal) when you plan your configuration using this tool.
Click here to read my article on the Custom Install.
Conclusion
Hopefully, this article will help you get familiar with the new look of Products and Services and avoid issues when installing products. If you feel that you spend too much time or hassle with your installs and would like help tailoring them to meet your needs, feel free to contact us at Hagerman. We'd be delighted to help.

Comments